Post Name

Modern cars often pack large touchscreens into the dash, and keeping these displays clear is key to enjoying every drive. A single scratch or dirty spot can make maps and menus hard to read. Car insurers warn that infotainment screens are surprisingly fragile – even a small dent or scratch can disable parts of the system . Worse, replacing a built-in navigation unit can cost thousands and take weeks . The good news? A little proactive care goes a long way.


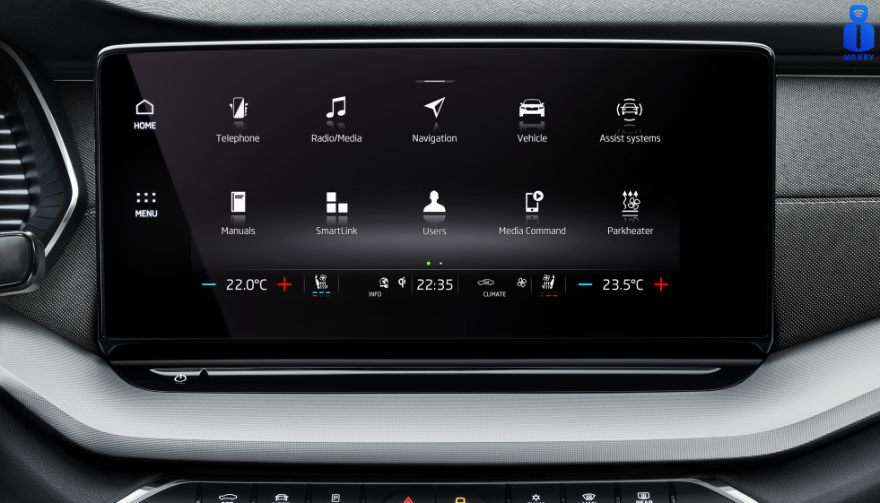
Interior dashboards are loaded with touchscreens that easily pick up scratches and smudges. For example, a high-quality navigation screen protector can shield your display from daily wear . These protectors are often made of tough 9H-tempered glass with an oleophobic coating (to repel fingerprints) and an anti-glare matte finish . A properly fitted protector keeps your screen looking brand-new and makes cleaning simpler.

Invest in a Quality Screen Protector


Choose the right fit
 Get a protector cut for your car’s make and model so it covers the entire display without blocking cameras or buttons.

Hydrogel protector over tempered glass

A hydrogel navigation screen protector is the best modern option for car screens. Unlike tempered glass, hydrogel film is flexible, ultra-thin, and self-healing — meaning small scratches disappear on their own over time. Hydrogel also fits curved or irregular screens better, doesn’t crack or chip like glass, and offers excellent clarity with strong anti-scratch and anti-glare properties. It maintains perfect touch sensitivity and blends seamlessly with the original display. To understand the real differences between hydrogel film and tempered glass — and which one offers the best long-term protection for your car — check out our detailed comparison guide: Hydrogel vs Tempered Glass Navigation Protectors Comparison.

Anti-glare & oleophobic coatings
 Many navigation screen protectors include a matte, anti-glare surface. This scatters harsh sunlight and helps repel fingerprints and oil. (Some even advertise oleophobic layers that resist smudges.)

Installation matters

Follow the instructions carefully (clean the screen first, align the film, and smooth out bubbles). A misaligned or bubbled protector can itself cause visibility issues.

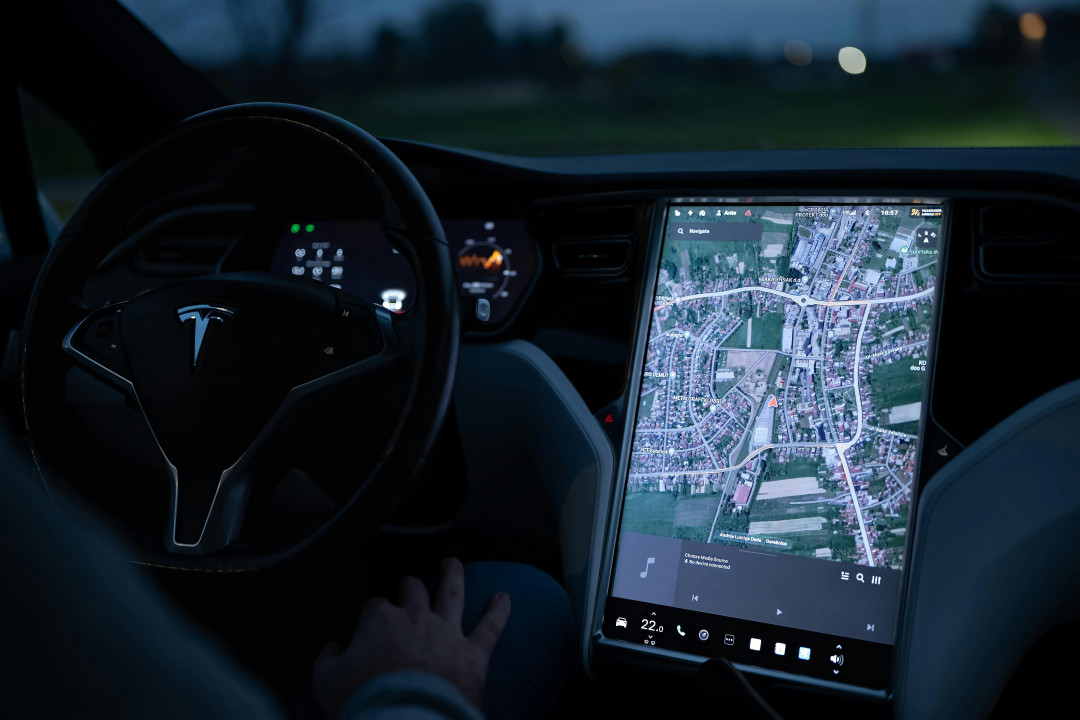
Installing a car screen protector isn’t just about preventing scratches. It also helps maintain screen clarity over time. As one Tesla owner discovered, adding a new glass protector made even a worn, glare-prone screen “look almost new again”


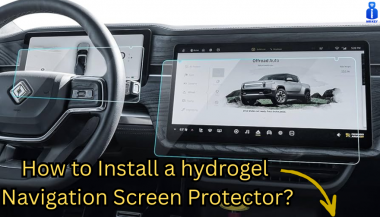
If you’ve already chosen a hydrogel protector and want to install it correctly, follow our step-by-step guide on how to install a hydrogel navigation screen protector.

Clean Your Screen the Right Way


Fingerprints, dust and grease are everyday enemies of visibility. But cleaning improperly can do more harm than good. Follow these expert tips:

Use a microfiber cloth

Wipe the screen with a soft, clean microfiber towel – even better if it’s dedicated just to your screen . This gentle fabric removes oils without scratching the glass.

Spray cleaner on the cloth, not the screen

If you need liquid cleaning, lightly mist it onto the cloth first. Never spray cleaners or water directly onto the touchscreen . Too much liquid or harsh chemicals can seep into seams or damage any oleophobic coatings.

Avoid household glass cleaners

Standard window cleaners (with ammonia or alcohol) can strip away protective coatings or damage the display . In fact, Car and Driver cautions that you should “avoid using household glass cleaner on your car’s touchscreen” unless you know it’s ammonia- and alcohol-free .

Use fresh wipes

Always use a clean side of your cloth or a new wipe on the screen. AGWS (an auto insurer) advises against using a cloth or wipe that’s already been on the dashboard or door panels – it can transfer grit and actually scratch the display

Detail with precision

If dirt or fingerprints linger, dampen the cloth with plain water or a gentle, screen-safe cleaner and buff in small circles. For stubborn spots, a second dry pass with the microfiber cloth will remove streaks.


Wipe smudges away with a soft cloth – spraying cleaner on the cloth, not on the screen . Clean your screen each time you wash the car, or whenever you notice foggy patches. In fact, one test found that many “interior detailer” sprays (like Chemical Guys or Meguiar’s) can work just as well as specialized screen cleaners if they’re labeled safe for screens.

Reduce Sunlight Glare


Glare is one of the biggest complaints with modern car touchscreens. It makes maps hard to read, increases eye strain, and leads to drivers pressing harder on the display—over time, this causes wear and visible marks.

To reduce glare:

Install a matte hydrogel screen protector

Adjust the display’s brightness and contrast

Avoid cleaning with shiny or oily cloths

Park with the dashboard away from intense sunlight when possible

Hydrogel films help significantly because they diffuse harsh reflections without dulling the screen.

Prevent Fingerprints and Smudges


Touchscreens are fingerprint magnets. Oils from your hands quickly accumulate on the surface, especially on climate controls or zoom gestures.

Solutions that actually work:

Oleophobic coatings (built into many hydrogel protectors)

Regular microfiber wipe-downs

Avoid touching the screen with sunscreen or lotion on your hands

Use voice commands for common actions when possible

Drivers notice a big difference after installing a car navi screen protector—much fewer smudges and much easier cleaning.

Protect the Screen During Everyday Use


Small habits reduce long-term wear:

Remove rings before using the touchscreen

Don’t store hard objects (keys, coins) near the display

Keep dust off the dashboard

Avoid pressing with fingernails

Use steering-wheel controls when possible

Tiny scratches add up, especially on softer automotive materials.


FAQ


What is the best way to protect a car navigation screen?

Installing a car-specific hydrogel screen protector provides the best protection against scratches, glare and fingerprints.

Do hydrogel protectors really self-heal?

Yes. The top layer softens slightly with heat and pressure, allowing micro-scratches to fade within minutes.

Do these protectors affect touch sensitivity?

No. Hydrogel films are extremely thin and designed to preserve the original touchscreen response.

Can I install a screen protector myself?

Hydrogel films are easy to install because they are flexible and bubble-resistant. Most people complete the installation in minutes.

Will a protector reduce screen brightness?

A high-quality hydrogel film maintains screen clarity while reducing harsh glare.

Do car manufacturers recommend screen protectors?

Many dealerships now advise using some form of screen protection due to rising replacement costs and increasing touchscreen sizes.

Which Cars Benefit Most

Some car brands benefit disproportionately from hydrogel screen protection — especially large-format touchscreens in premium models. If you want the full breakdown of the top models for 2025–2026, see our detailed guide on which cars benefit most from hydrogel navigation protection.

To protect your own car’s screen from scratches, glare and fingerprints, visit our shop at mr-key.com.


Related Guides

How to Install a Hydrogel Navigation Screen Protector

Which Cars Benefit Most From Hydrogel Navigation Protection? (2026 Overview)

Hydrogel vs Tempered Glass Navigation Protectors Comparison

Related Posts

How to Install a Hydrogel Navigation Screen Protector

How to Install a Hydrogel Navigation Screen Protector

Nowadays car interiors rely heavily on touchscreens. Whether you drive a BMW 3 Series , VW Golf , Audi A4 , Mercedes A-Class , Peugeot 3008 , or Skoda Octavia , your infotainment display is the centre of navigation, settings, entertainment and safety features. But these screens are also fragile—prone to scratches , fingerprints , micro-abrasions , and glare . A hydrogel navigation screen protector is one of the best ways to protect your car touchscreen without affecting clarity or touch sensitivity. This guide shows you exactly how to install a hydrogel protector , step by step, with expert tips, mistakes to avoid, and a few insider tricks that most guides miss. What Is a Hydrogel Screen Protector? Hydrogel is a soft, self-healing, flexible material used widely in phone protection and now increasingly in automotive displays. Unlike tempered glass, it adapts to curved edges and eliminates small bubbles over time. For more technical background, you can read the scientific definition on hydrogels Hydrogel is ideal for infotainment screen protection because it: Reduces glare Absorbs micro-scratches Maintains full touch sensitivity Adapts to curved and angled car screens Self-heals small marks over 24–48 hours It’s especially useful for European cars where screens are large and glossy, such as: Mercedes MBUX screens (A-Class, C-Class, GLC) Volkswagen MIB systems (Golf, Passat, Tiguan) BMW iDrive displays (3 Series, X1, X3) Audi MMI touchscreens (A4, A3, Q5) Peugeot i-Cockpit models Renault Clio, Captur, Megane Skoda Octavia, Superb, Scala Curious which specific models benefit the most from hydrogel protection? Check out our full guide on which cars benefit most from hydrogel navigation protection . Before You Start: Essential Preparation Installing a hydrogel protector takes only a few minutes, but the preparation stage determines whether the final result looks factory-perfect . You Will Need Hydrogel screen protector Microfiber cloth Screen-cleaning wipe (wet & dry) Dust-removal sticker (optional but recommended) Small squeegee / card Choose the Right Environment Install the protector in: A dust-free space (car parked indoors is ideal) Soft lighting (so dust particles are visible) A still environment (no wind, no blowing air) Avoid doing it outside or while standing near open windows. Step-by-Step: How to Install a Hydrogel Navigation Screen Protector 1. Clean the Navigation Screen Thoroughly Use a wet wipe first, then a dry microfiber cloth. Focus on: Corners Edges Around the frame Any oily fingerprints Tip: Turn the screen off to see dust more easily. 2. Remove All Dust Particles Even one small dust speck can create a permanent bubble. Use: Dust-removal stickers A clean microfiber cloth Hold the screen at an angle and look under the light. If perfectionism matters anywhere, it’s here. 3. Peel the First Protective Layer Most hydrogel protectors have two layers . Peel Layer 1 halfway and align the protector with: Left and right edges Upper frame Any curved edges Do not peel it completely yet. 4. Align and Apply the Protector Once aligned: Press the top centre gently Slowly drag your finger downward Peel off the rest of Layer 1 as you go The film will naturally stick without much force. 5. Use the Squeegee to Push Out Air Work from centre outward , using firm but controlled pressure. Hydrogel is self-healing , so small micro-bubbles usually disappear within 24–48 hours . 6. Remove the Final Top Layer After application: Peel Layer 2 from one corner Pull slowly to avoid lifting the protector This reveals a glossy, clear surface below. 7. Allow 24 Hours for Full Adhesion Do not touch the screen too much during this period. Avoid: Heat exposure Cleaning sprays Aggressive pressing Hydrogel needs time to “settle” and self-heal. Common Mistakes to Avoid Even a perfect protector can be ruined by simple errors. Installing in a dusty environment Fibres, dust and hair easily get trapped. Touching the sticky side This leaves permanent marks. Rushing the alignment Hydrogel is flexible but not stretch-proof. Cleaning with alcohol after installation This can damage the outer coating. Installing on a hot screen Heat weakens adhesion and causes micro-bubbles. For a complete walkthrough , see our guide on how to protect your car’s navigation screen . Why Hydrogel Is Better Than Tempered Glass for Car Screens Tempered glass works well for smartphones—but not for car navigation screens. Hydrogel performs better because: It bends and adapts to curved displays It doesn’t create raised edges It avoids touchscreen sensitivity issues It self-heals micro-abrasions It provides better Anti-Glare performance If you want to see more in depth guide on why hydrogel protectors are better check out our guide on Hydrogel vs Tempered Glass Navigation Protectors Comparison FAQs 1. Does a hydrogel protector reduce screen sensitivity No. Hydrogel maintains full touch responsiveness because the material is soft and pressure-adaptive. 2. Can I reuse a hydrogel screen protector? No. Once removed, it cannot be reinstalled cleanly. 3. How long do micro-bubbles take to disappear? Usually 24–48 hours. Stubborn ones may take up to 72 hours if the screen is curved. 4. Will the protector affect brightness or clarity? High-quality hydrogel preserves original screen clarity. Matte versions reduce glare but may slightly soften reflections. 5. Is hydrogel safe for anti-reflective or coated screens? Yes. Hydrogel adhesive is gentle and does not damage coatings. If you want premium hydrogel protectors for BMW, Audi, Mercedes, VW, Peugeot, Renault, Skoda and more, explore our full selection today. Visit our shop at mr-key.com Related Guides Which cars benefit most from hydrogel navigation protection How to Protect Your Car’s Navigation Screen from Scratches,Glare & Fingerprints Hydrogel vs Tempered Glass Navigation Protectors Comparison

Programming Your Car’s Keyless Remote: A Simple Guide for Every Car Owner

Programming Your Car’s Keyless Remote: A Simple Guide for Every Car Owner

When it comes to convenience, car keyless remotes have revolutionized the way we interact with our vehicles. No more fumbling with traditional keys or worrying about locking yourself out. With just a push of a button, you can lock, unlock, and even start your vehicle. But what happens when your keyless remote stops working, or when you need to program a new one? Here’s a simple guide to help you program your car's keyless remote, regardless of your vehicle's make or model. Understanding Keyless Remotes Before jumping into the programming process, it’s important to understand what a keyless remote is and how it works. Essentially, a keyless remote allows you to interact with your vehicle without needing to physically insert a key. Instead of using a traditional metal key, your car’s electronic system communicates wirelessly with the remote, allowing you to lock, unlock, and sometimes even start your vehicle, all with the push of a button. These remotes typically use a radio frequency to communicate with your car, sending a signal that’s encrypted for security. Most modern cars use transponder technology, which makes the system more secure and resistant to hacking or copying. This means that the remote must be properly programmed to your vehicle’s system to function correctly. When Do You Need to Program a Keyless Remote? There are several situations in which you might need to program your keyless remote: Replacing a Lost or Damaged Remote : If you’ve lost your keyless remote or it’s no longer functioning properly, you’ll need to get a replacement. This may require programming the new remote to sync with your vehicle. Adding a New Remote : If you’ve bought an additional keyless remote for your car (for a spouse, child, or other family member), you’ll need to program it so that it works with your vehicle. Battery Replacement : Sometimes, replacing the battery in your remote can cause the programming to reset, meaning you’ll need to reprogram the remote for it to work again. Changing or Resetting Vehicle Settings : Occasionally, vehicle settings or remotes can be reset or reprogrammed as part of regular maintenance, requiring you to program new or additional remotes. How to Program Your Car’s Keyless Remote Programming a keyless remote is easier than you might think, and in most cases, it can be done by following a few simple steps. The process varies slightly depending on the make and model of your car, but here’s a general overview of the steps involved: Get Your New or Replacement Remote : Ensure that your remote is compatible with your car’s system. If you're not sure, you can check with your car's manufacturer or an authorized dealership. Some remotes require specific codes to be programmed. Sit Inside Your Vehicle : For safety and security reasons, most cars require you to be inside the vehicle while programming the remote. Insert the Key in the Ignition : Insert the key into the ignition and turn it to the "ON" position without starting the engine. For cars with push-to-start systems, you may need to press the start button without pressing the brake pedal. Activate the Programming Mode : Depending on your car’s system, you’ll need to follow a sequence of steps to enter programming mode. This could involve turning the key on and off several times, or pressing certain buttons in a specific order. Refer to your vehicle’s manual for the exact steps, as the process can differ from one model to another. Program the Remote : Once your car is in programming mode, you’ll need to press the button on your keyless remote that you want to program. Usually, you’ll hear a chime or see the lights flash, indicating that the remote has been successfully programmed. Some cars may require you to press the button several times to ensure proper synchronization. Test the Remote : After programming, test the remote to make sure it works properly. Try locking and unlocking the doors or starting the engine. If everything works as expected, you’re done! Exit Programming Mode : To finish the process, simply turn off the ignition and remove the key. This should exit programming mode. If you have additional remotes to program, repeat the steps above for each one. What to Do if Programming Doesn’t Work While programming a keyless remote is usually a straightforward process, there are instances where things don’t go as planned. If your remote isn’t syncing with your car after following the steps, here are a few troubleshooting tips: Check the Battery : If the remote’s battery is dead or weak, it won’t transmit the signal to your car. Replace the battery and try programming again. Verify the Compatibility : Make sure that the remote is compatible with your vehicle’s make, model, and year. Some vehicles require special remotes that can only be programmed by the manufacturer or an authorized locksmith. Reset Your Vehicle’s System : In some cases, you might need to reset the car’s system to clear previous programming attempts. Check your owner’s manual or consult a professional for assistance. Consult a Professional : If you continue to have issues, it might be time to visit a dealership or a certified locksmith. These professionals have the tools and experience to program the remote correctly and ensure everything works seamlessly. Why Programming Your Keyless Remote Is Important Programming your keyless remote is a simple but important task that helps ensure your car’s security and convenience. By understanding how the process works and what to do if things go wrong, you’ll be able to troubleshoot and solve any issues quickly. Whether you’re replacing a lost remote or adding a new one to your collection, knowing how to program your remote saves time and money compared to visiting a dealership or locksmith. With the increased reliance on keyless remotes for unlocking and starting vehicles, it’s essential for every car owner to be familiar with this process. By keeping your remote in good working condition and knowing how to program it when necessary, you’ll enjoy a smoother, more efficient experience with your vehicle.

Top 10 Most Common Car Key Problems (And How to Fix Them)

Top 10 Most Common Car Key Problems (And How to Fix Them)

Car keys have changed dramatically in the last 20 years. What was once a simple mechanical tool has become an essential electronic device packed with functionality. From remote locking and trunk opening to push-start ignition systems and proximity sensors, today's car keys do a lot more than just turn in the ignition. However, this increased functionality also means more components that can fail—and when they do, the inconvenience can be frustrating or even immobilizing. For many drivers, key problems seem to come out of nowhere. A button stops working, the car doesn’t start, or a backup key won’t respond. Understanding the most common issues with modern car keys can help you avoid unnecessary trips to the dealership and identify quick fixes at home. Below, we’ll explore the ten most frequent car key problems, how to recognize the symptoms, and what steps to take to get your key working again—often without spending a fortune. 1. The Key Fob Has Stopped Responding One of the most common complaints drivers have is that their key fob simply stops responding. The remote may no longer lock or unlock the vehicle, the trunk button might stop working, or there may be no visible LED indicator when you press a button. In most cases, the culprit is a dead battery—something that’s inexpensive and easy to replace. Most key fobs use a CR2032 coin-cell battery, which can typically be changed with a small screwdriver or a plastic pry tool. If replacing the battery doesn’t bring the fob back to life, the issue may be with the internal electronics. Moisture, drops, and general wear over time can corrode or damage the tiny circuit board inside. In such cases, replacing the outer shell might not be enough—you may need to invest in a full replacement or transplant the electronics into a new case if only the buttons or housing are damaged. 2. The Car Doesn't Detect the Key Another increasingly common issue—especially in vehicles with push-to-start systems—is that the car doesn’t detect the key, even though it's inside the cabin or close to the sensor. You might see a warning on the dashboard such as “Key Not Detected” or “No Key Present.” This can happen due to a nearly dead battery in the fob, radio frequency interference from nearby electronics, or a fault in the key’s transponder chip. The first step is always to replace the key’s battery. If the issue persists, try holding the key closer to the start button or steering column—some vehicles have hidden backup sensors that detect the key at close range in emergencies. If none of that works, the problem could be with the chip inside the fob or the vehicle’s receiver, requiring diagnosis by a qualified locksmith or dealership technician. 3. The Key Turns in the Ignition, But Nothing Happens This issue is particularly frustrating: you insert your key into the ignition, it turns freely, but the car doesn’t respond at all. Often, this is a sign that the vehicle’s immobilizer system isn’t recognizing the key. Modern car keys contain a small RFID chip that communicates with the car’s anti-theft system. If this chip is damaged or unprogrammed, the vehicle will not start—no matter how well the mechanical part of the key works. Try using a spare key if you have one. If the backup works, you’ll know the issue lies within the primary key. If neither key works, the problem could be with the vehicle’s receiver, antenna ring, or immobilizer control unit. A professional diagnostic scan is typically needed to pinpoint the cause. 4. The Key Won’t Turn in the Door or Ignition If your key suddenly stops turning in the door or ignition cylinder, the cause may be as simple as wear and tear. Key blades—especially older ones—can become worn down over time, resulting in poor contact with the internal pins in the lock. Dirt, rust, or debris inside the lock can also prevent the key from turning, particularly if the vehicle hasn’t been manually unlocked in a while. First, try using a backup key. If it turns smoothly, your main key is likely worn. If both keys struggle, apply a non-residue contact cleaner or lock lubricant to clean out the cylinder. For long-term solutions, you may need to replace either the key blade or the ignition/door lock entirely. Don’t attempt to force the key, as this could cause the blade to bend or snap inside the lock. 5. The Buttons Feel Mushy or Stuck Physical wear is one of the most overlooked causes of key fob failure. Over time, the rubber buttons on your remote can wear down, become loose, or stop pressing properly. You might notice that only one or two buttons respond, or that they must be pressed harder than usual to work. In many cases, the outer shell has simply degraded, while the electronic board inside remains perfectly functional. The most effective fix is to replace the key shell. These replacement housings are inexpensive and widely available for most major vehicle brands. Simply open the fob, transfer the circuit board, battery, and buttons into the new shell, and your key will feel and function like new again—without any need for reprogramming. 6. Your Key Fob Got Wet Water and electronics rarely mix well, and key fobs are no exception. Whether your key was left out in the rain, fell into a puddle, or went through the washing machine, moisture can quickly short-circuit the internal components or lead to long-term corrosion. If your key gets wet, act fast. Remove the battery immediately and open the case to allow air circulation. Use desiccants such as silica gel packets to dry out the internal parts—avoid using rice, which is far less effective. If corrosion is visible, gently clean it with isopropyl alcohol and a cotton swab. If the key still doesn’t work after drying, the damage may be permanent and require replacement. 7. The Key Shell Is Cracked or Broken Keys endure daily use, pocket pressure, accidental drops, and exposure to the elements. Over time, the plastic casing of the fob can crack, split, or completely fall apart, leaving internal electronics vulnerable. Although a broken shell doesn’t necessarily mean the key is non-functional, it can make usage difficult and risky. Thankfully, key shell replacements are an easy and budget-friendly solution. You can often reuse all your original components, including the battery, buttons, and transponder chip. Replacing just the shell avoids costly reprogramming and restores your key’s durability and appearance. 8. The Key Still Doesn’t Work After Replacing the Battery Replacing a fob battery is supposed to solve the problem—but sometimes it doesn’t. If your remote remains unresponsive after a battery change, you may have installed the wrong type of battery, inserted it incorrectly, or failed to clean the contact points inside the fob. In some cases, the circuit board itself may be damaged or shorted out. Double-check that the battery type matches the original (commonly CR2032). Ensure it’s properly seated and that the metal contact tabs are clean and secure. If the problem continues, the issue likely lies with the circuit board, and the fob may need to be replaced entirely. 9. You’ve Lost Your Only Key Few things are more stressful than losing your only car key—especially if you don’t have a spare. Most modern vehicles require the key to be electronically paired with the car, so simply cutting a new blade isn’t enough. You’ll need your Vehicle Identification Number (VIN), proof of ownership, and a visit to either a dealership or a certified locksmith. Some aftermarket services can offer replacement keys that are compatible with your vehicle at a lower price than the dealership. Once the new key is cut and programmed, be sure to create and safely store a backup key to avoid being locked out in the future. 10. The Spare Key Doesn’t Work Anymore Spare keys are often kept in drawers or glove compartments for years without use. When finally needed, many drivers are surprised to find that the backup key doesn’t work. Batteries may have died, circuit boards may have degraded, or the key may have fallen out of sync with the vehicle. Start by replacing the battery. If that doesn’t work, the spare may need to be reprogrammed to the car. Keeping your spare key in a safe, climate-controlled environment and testing it occasionally is the best way to ensure it's ready when needed. Car key problems can range from mildly inconvenient to seriously disruptive—but the majority are entirely fixable, often at home and at minimal cost. Understanding the common causes behind these issues allows you to respond quickly, avoid dealership prices, and extend the life of your keys. At mr-key.com , you’ll find a wide selection of replacement key shells , batteries , blades , and complete electronic keys compatible with dozens of vehicle brands. With proper care and the right tools, you can keep your key in excellent condition and avoid ever being stranded due to a faulty fob.

How to Remove or Change a Roof Rack Lock Barrel Easily

How to Remove or Change a Roof Rack Lock Barrel Easily

Changing or removing the lock barrel on your roof rack may seem like a daunting task, but it’s actually simpler than you might think. Whether you need a replacement due to a lost key, wear and tear, or just want to swap out an old lock for a new one, following the right steps can make the process hassle-free. This guide will walk you through everything you need to know about handling a roof rack lock barrel with ease. Why You Might Need to Change a Roof Rack Lock Barrel ? There are several reasons why you may want to replace or remove your roof rack lock barrel: Lost Key : If you've misplaced the key, replacing the lock barrel is often the most practical solution. Upgrading the Lock : Maybe you want a more secure lock for added peace of mind. Routine Maintenance : Over time, lock barrels can wear down, making it harder to insert or turn the key. Uniformity : If you've recently changed your car key, you may want to match your roof rack lock with it. Knowing why you’re changing the lock barrel will help you determine the steps you need to follow. What You’ll Need Before you start, gather these essential tools and items: Replacement Lock Barrel : Ensure it’s compatible with your roof rack model. Master Key or Removal Key : Often required to remove the old lock barrel. New Key : The key that corresponds to the replacement lock barrel. Flathead Screwdriver : To gently pry and release certain parts if needed. Step-by-Step Guide to Removing a Roof Rack Lock Barrel Removing a lock barrel from your roof rack doesn’t require extensive mechanical skills. Just follow these straightforward steps: 1. Locate the Lock Barrel The lock barrel is usually situated in the center or side of the roof rack. Look for the small lock with the keyhole, as this is where you'll be inserting the master or removal key. 2. Insert the Master Key or Removal Key If you have a master or removal key, insert it into the lock. This is often a universal key provided by the lock manufacturer specifically for removing lock barrels. Once it’s inserted, turn the key slightly to unlock the barrel. Tip: If you don’t have a removal key, contact a professional or see if you can order one specifically for your model. 3. Pull the Lock Barrel Out With the removal key still in place, gently pull the lock barrel out. If it’s resistant, try wiggling it slightly while pulling. Avoid forcing it, as this could damage the lock or roof rack. In some cases, you may need a flathead screwdriver to help pry it out, but be careful not to scratch the surrounding area. 4. Check the Casing After removing the lock barrel, inspect the casing where the barrel was installed. Make sure it’s clean and free of debris. Any dirt or rust could interfere with the new lock barrel, so it’s a good idea to clean this area before proceeding. Installing the New Lock Barrel Once the old barrel is removed, you’re ready to install the new one. Here’s how: 1. Align the New Lock Barrel Take your new lock barrel and align it with the casing where the old one was. Most barrels are designed to fit in only one direction, so make sure you align it properly to avoid jamming. 2. Insert the New Barrel Push the new lock barrel into the casing until it clicks into place. This might require a bit of pressure, but it should fit snugly without needing excessive force. 3. Test the New Key After installing the new lock barrel, insert the new key and turn it to ensure it’s working smoothly. The key should turn easily and lock securely. This step verifies that the new lock is properly aligned and functional. Common Challenges and Solutions While changing a roof rack lock barrel is generally straightforward, you might encounter some challenges. Here’s how to troubleshoot common issues: Stuck Barrel : If the old barrel is stuck, apply a lubricant like WD-40 around the lock to help loosen it. No Removal Key : If you don’t have a master or removal key, consider reaching out to a locksmith or checking if the manufacturer offers a replacement. Barrel Won’t Fit : Ensure you’ve purchased a compatible lock barrel. Even slight differences in design can prevent it from fitting properly. Tips for Maintaining Your Roof Rack Lock To keep your new lock barrel in good condition and prevent the need for frequent replacements, consider these maintenance tips: Regular Cleaning : Dirt and grime can accumulate inside the lock over time, making it harder to operate. Clean the lock regularly to prevent this. Use Lubricant : Apply a small amount of lubricant inside the lock barrel periodically to keep the key turning smoothly. Protect from Rust : If your roof rack is exposed to rain and humidity, use a protective cover or shield to keep moisture out of the lock barrel. Check Key Fit : Avoid using a damaged or bent key, as this can wear out the lock barrel more quickly. When to Seek Professional Help In some cases, removing or replacing a roof rack lock barrel might require assistance from a professional: Lost or Damaged Keys : If both your main key and master key are lost or damaged, a professional can help retrieve or replace the lock barrel. Damaged Lock Mechanism : If the lock itself is damaged or jammed, forcing it can make things worse. A professional locksmith can safely remove and replace it. Replacing or removing a roof rack lock barrel is an affordable and manageable task for most car owners. By following the right steps and keeping up with regular maintenance, you can ensure your roof rack lock stays functional and secure. Whether you’re upgrading for security or replacing a worn-out lock, a new lock barrel can make all the difference in keeping your roof rack safe. Effortless Key Replacement for a Variety of Locks Order 2x Union Keys FT Series, custom-cut to your original key code, for a hassle-free replacement. Compatible with a range of locks, including those from Aston Martin, Jaguar, Land Rover, and more, these keys are perfect for classic cars, caravans, petrol caps, roof racks, and truck canopies. Simply find your lock code (e.g., FT101-FT360) on the lock face and enjoy fast delivery of high-quality spare keys.

Chat with us