Post Name


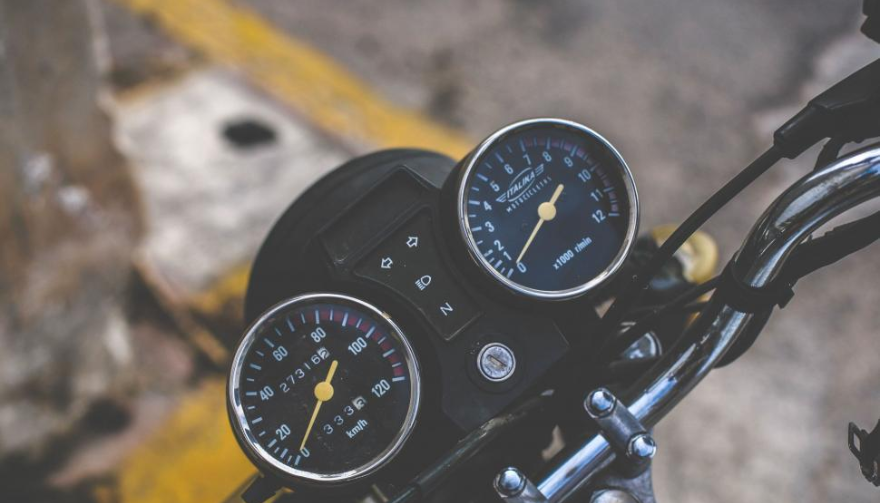
Modern motorcycles are smarter, more connected, and more expensive than ever. At the center of that evolution sits the TFT display—your bike’s digital command hub. Speed, revs, riding modes, navigation, calls, warnings. One exposed surface controls it all. And it’s far more vulnerable than most riders realise.
A motorcycle screen protector isn’t an accessory. It’s preventive maintenance. Ignore it, and you’re gambling with one of the most expensive components on your bike.

The Hidden Weak Point on Modern Motorcycles
Motorcycle manufacturers invest heavily in engines, frames, and electronics. But the TFT display? It’s still a thin, exposed panel, mounted directly in the line of fire.

Unlike a phone, it:
Lives outdoors 24/7
Takes direct UV exposure
Gets hit by dust, sand, insects, and road debris
Is cleaned repeatedly—often incorrectly

A single mistake is enough to leave permanent damage.

TFT Displays Scratch Far Easier Than You Think
Most motorcycle TFT screens are plastic-based or plastic-coated, not hardened glass like premium smartphones.
That matters.
Plastic scratches:
From dust particles wiped across the surface
From dry cloths or paper towels
From jacket zippers or gloves
Even from “careful” cleaning at fuel stops

Once scratched, there is no polish, no fix, no reset. The damage is permanent.

A motorcycle display protector absorbs this damage instead of the screen itself.


Sunlight Is Quietly Destroying Your Display
UV exposure doesn’t crack screens overnight. It does something worse.

It slowly:
Fades colours
Reduces contrast
Creates uneven patches
Permanently dulls brightness

After a few summers, the display that once looked sharp now looks tired—especially when riding in direct sunlight.
A quality bike screen protector acts as a UV barrier, preserving clarity and colour accuracy for years.

Glare Isn’t Just Annoying. It’s Dangerous.
A washed-out screen at speed isn’t just inconvenient.

It means:
Missed warning lights
Hard-to-read navigation prompts
Delayed reaction times

In bright sun, an unprotected TFT can become a mirror.
Screen protectors designed for motorcycles reduce reflections and glare, improving readability in real-world riding conditions—not showroom lighting.

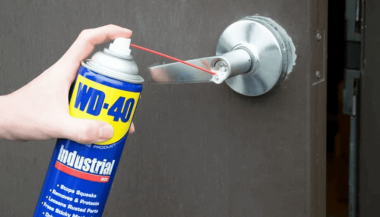
Cleaning Your Screen Is Probably Damaging It
Most riders clean their TFT displays the same way they clean helmets or windscreens. That’s a mistake.

Common causes of micro-scratches:
Dry wiping
Paper towels
Window cleaners
Cloths contaminated with dust

Over time, these tiny marks add up. The screen becomes hazy. Night riding gets worse. Contrast drops.
A motorcycle screen protector takes that abuse instead—so you can replace the protector, not the display.

The Real Cost of a Damaged Motorcycle TFT Display
Here’s what many riders discover too late.

Replacing a TFT display typically costs:
€800–€1,200 for the part
Labour and coding often extra
In many cases, the bike must go to an authorised dealer

Insurance often won’t cover cosmetic damage. Scratches don’t qualify as “failure.”
A screen protector costs a fraction of that—and eliminates the risk entirely.

Resale Value Takes a Direct Hit
Buyers notice screens immediately.

A scratched or faded TFT display:
Signals neglect
Raises questions about overall maintenance
Lowers perceived value

Even if the bike is mechanically perfect, a damaged display can knock hundreds off resale or trade-in value.
Protecting the screen protects the bike’s future value.

Why Motorcycle Displays Are More Vulnerable Than Phones
It’s tempting to compare TFT displays to smartphones.
That comparison fails.

Motorcycle screens:
Are permanently exposed to the elements
Experience constant vibration
Are cleaned in uncontrolled environments
Sit at steep angles that catch sunlight

They endure more abuse in one riding season than most phones do in five years.
A dedicated motorcycle display protector is designed for exactly these conditions.

Screen Protectors Don’t Affect Touch or Visibility
A common myth: screen protectors reduce clarity or touch response.

High-quality motorcycle screen protectors are:
Ultra-thin
Optically clear
Designed for glove interaction
Precisely cut for each display shape

Once installed, most riders forget it’s even there—until it saves the screen.

Installation Is Easier Than You Expect
Modern protectors are made for DIY installation.

Typically:
No liquids required
No permanent adhesives
No tools beyond what’s included

With careful alignment, installation takes minutes—and protects the display for years.

Who Should Use a Motorcycle Screen Protector?
Short answer: every rider.

Especially if you:
Park outdoors
Ride in bright sun
Tour long distances
Use navigation or Bluetooth features
Plan to keep or resell the bike

If your motorcycle has a TFT display, it’s already at risk.

FAQ

Do motorcycle TFT displays scratch easily?
Yes. Most TFT displays use plastic-based surfaces that scratch far more easily than smartphone glass—often from normal cleaning alone.

Can a scratched motorcycle display be repaired?
No. Scratches are permanent. The only true fix is replacing the entire display unit.

How much does it cost to replace a motorcycle TFT screen?
Replacement typically costs between €800 and €1,200, excluding labour and dealer programming.

Does a screen protector affect brightness or touch sensitivity?
No. Quality protectors are optically clear and maintain full touch responsiveness.

Is a motorcycle screen protector worth it?
Considering the replacement cost of a TFT display, a screen protector is one of the highest-value protective upgrades you can make.

Can I remove or replace the protector later?
Yes. Screen protectors are removable and replaceable without damaging the original display.

Protect the Most Expensive Screen on Your Bike
Your motorcycle’s TFT display is essential, fragile, and costly to replace.
Damage doesn’t announce itself. It accumulates quietly—scratch by scratch, fade by fade—until it’s too late.

Visit our shop at mr-key.com to explore our motorcycle screen protectors and protect your display before the damage becomes permanent.

Related Posts

Condensation Inside Motorcycle TFT Displays: Causes, Warning Signs & What It Really Means

Condensation Inside Motorcycle TFT Displays: Causes, Warning Signs & What It Really Means

Every modern motorcycle rider has seen it. You park your bike after a cold morning ride, glance at the dashboard, and notice a faint haze forming behind the TFT screen. Maybe small droplets gather along the edges. Maybe the whole display looks fogged from the inside. That moisture is not cosmetic. It is water inside a sealed electronic unit — and it is the earliest visible warning of a problem that can destroy a component costing €700 to over €1,200 to replace. This guide explains exactly why condensation forms inside motorcycle TFT displays, which bikes are most affected, what it really means for your instrument cluster, and the one affordable upgrade that prevents the damage cycle before it starts. Why Motorcycle TFT Displays Get Condensation Inside A motorcycle TFT display is a sealed electronic module exposed to some of the harshest conditions any screen will ever face. Unlike your phone in a pocket, a motorcycle dashboard sits directly in the path of rain, road spray, temperature swings, UV radiation, and constant vibration. Condensation forms when warm, humid air trapped inside the display housing meets a cooler surface — the glass front panel. The moisture in that air turns to liquid droplets on the coldest point, which is almost always the inside face of the screen. Here is how moisture gets trapped in the first place. Thermal breathing. Every ride creates a heat cycle. The engine, direct sunlight, and the display's own backlight warm the air inside the housing. When the bike stops and cools, that air contracts and draws in fresh, humid outside air through micro-gaps in the seals. Over weeks and months, humidity accumulates inside the unit. Seal degradation. The rubber gaskets and adhesive bonds that seal a TFT housing are not permanent. UV exposure breaks down rubber. Vibration loosens adhesive joints. Temperature cycling causes materials to expand and contract at different rates, gradually opening pathways for water ingress. Micro-damage to the front surface. Stone chips, cleaning scratches, and pressure marks on the display face can create hairline cracks invisible to the naked eye. These become moisture entry points — especially in rain or when using a pressure washer. High-humidity environments. Riders in coastal areas, tropical climates, or northern European countries with persistent dampness face accelerated moisture ingress. A bike garaged in a humid environment without ventilation is particularly vulnerable. The result is always the same: water inside the display that the sealed housing cannot easily release. Which Motorcycles Are Most Affected Condensation inside TFT displays is not limited to one manufacturer. It has been documented across virtually every major brand using TFT instrument clusters. BMW — The R 1250 GS, R 1300 GS, S 1000 RR, F 850 GS, and F 900 R all use 6.5-inch or 10.25-inch TFT displays. These are high-quality units, but they sit in exposed positions — particularly on adventure models ridden in all weather conditions. OEM replacement for the 6.5-inch TFT runs around £1,200, and if the wiring loom is damaged during theft or failure, that figure can reach £3,000+. Yamaha — Models like the MT-09, MT-07, Tracer 9, and Ténéré 700 use TFT dashboards. Yamaha's displays are generally well-sealed, but the same thermal breathing cycle applies. Adventure and touring riders who cover high mileage in variable conditions report condensation after 2–3 seasons. Honda — The Africa Twin, CB650R, and CBR1000RR-R all run TFT clusters. The Africa Twin's display sits in a highly exposed cockpit position. Forum reports from owners confirm moisture ingress, especially after extended wet-weather riding. Triumph — The Tiger 900, Street Triple, and Speed Triple RS use TFT displays. Triumph's units are compact, but the same vulnerability to vibration-induced seal failure applies across the range. Kawasaki — The Z900, Ninja 1000SX, Versys 1000, and newer Z650 models all feature TFT dashboards. Like all manufacturers, Kawasaki's sealed units face the same environmental pressures. The pattern is clear: this is not a brand-specific defect. It is an inherent vulnerability of mounting sensitive display technology in one of the most hostile environments imaginable. The Warning Signs You Should Never Ignore Condensation inside a motorcycle TFT display is progressive. It starts small and escalates. Here is what each stage looks like — and what it means. Light fogging after a cold start. A thin mist on the inside of the screen that clears within 10–15 minutes of riding. This is the earliest sign. Moisture is present inside the housing but has not yet caused damage. At this stage, the problem is still manageable. Persistent edge condensation. Droplets that form along the bottom or side edges of the display and do not fully evaporate during a ride. This means moisture is accumulating faster than it can escape. The seals are compromised. Internal staining or water marks. Visible trails, spots, or discolouration behind the glass that remain even when the display is dry. This is mineral residue from evaporated water. It means moisture has been cycling inside the display repeatedly. The internal coatings and bonding layers are being attacked. Intermittent display issues. Flickering backlight, sections of the screen dimming unevenly, or the display briefly shutting off during a ride. These are early signs of electrical damage from moisture reaching the circuit board or flex connectors behind the panel. Dead pixels appearing alongside condensation. If you see pixel failure combined with any visible moisture, the display is in active degradation. The liquid crystal layer or its driver circuits are being damaged. This combination almost always leads to full failure. Complete display blackout. The screen powers on but shows nothing, or fails to power on at all. At this point, the TFT module is usually beyond repair and must be replaced entirely. The critical takeaway: condensation that clears quickly is a warning. Condensation that stays, stains, or coincides with display glitches means damage is already underway. What Condensation Actually Does to a TFT Display The fog itself is not the problem. The damage happens behind it. A motorcycle TFT display is a laminated stack of layers: a front glass or polycarbonate cover, a polarising film, the liquid crystal panel itself, LED backlighting, and a circuit board with drivers and connectors. All bonded together with adhesive and housed in a sealed plastic or metal frame. When moisture sits inside this assembly, several destructive processes begin simultaneously. Corrosion of electrical contacts. The flex cables and solder joints connecting the LCD panel to the main circuit board are extremely sensitive to moisture. Even trace amounts of water can cause oxidation, increasing resistance and eventually breaking the connection. This is how entire rows or columns of pixels fail at once. Delamination of optical layers. The adhesive bonds between the polariser, LCD panel, and backlight diffuser swell and weaken when exposed to moisture. This causes visible clouding, uneven brightness, and eventually permanent optical distortion. Mineral deposits on internal surfaces. Water that evaporates inside the display leaves behind dissolved minerals and contaminants. These deposits scatter light, reduce contrast, and cannot be cleaned without disassembling the unit — which is rarely possible without destroying it. Short circuits on the PCB. If enough moisture reaches the main circuit board, it can bridge traces and create short circuits. This can cause complete display failure, error codes, or even damage to the motorcycle's CAN bus communication system. A motorcycle TFT display is not designed to be serviced. It is a sealed, disposable module. Once moisture damage reaches the internal electronics, the only option is full replacement. How to Prevent Water Ingress in Motorcycle TFT Displays Before Damage Starts Prevention is not complicated. But it requires acting before symptoms appear — not after. Never use a pressure washer on the dashboard. High-pressure water jets force moisture past seals that can handle rain but not direct, concentrated spray. Wash the display area gently with a damp microfibre cloth and motorcycle-safe LCD cleaner. Avoid parking in direct sunlight for extended periods. Prolonged heat accelerates UV degradation of seals and adhesives. It also increases the temperature differential that drives the thermal breathing cycle. Use a cover or park in shade when possible. Store the bike in a ventilated, dry environment. A damp, unventilated garage is one of the worst places for a motorcycle with a TFT display. If humidity control is not possible, a small dehumidifier or silica gel packs placed near the bike can help. Inspect the display edges regularly. Look for any visible gap between the display housing and its frame, or any separation of the front glass from the body. Catching a seal failure early — before moisture accumulates — gives you the chance to act. Protect the display surface from physical damage. The front face of the TFT is the largest and most vulnerable entry point for moisture. A single stone chip or a scratch from an abrasive cloth can breach the surface coating and create a pathway for water. Preventing that surface damage is the single most effective thing you can do. The One Upgrade That Prevents Condensation Damage in Motorcycle TFT Displays A quality screen protector designed specifically for your motorcycle's TFT display is the most cost-effective protection available — by a wide margin. Here is what a properly fitted screen protector actually does. It creates a physical barrier against impact. Stone chips, gravel flicks, and minor impacts hit the protector instead of the display surface. This eliminates the micro-cracks that become moisture entry points. It shields the surface from UV radiation. UV is the primary cause of seal and adhesive degradation. A screen protector absorbs UV energy before it reaches the display housing, slowing the ageing process of the seals beneath. It prevents cleaning damage. Without a protector, wiping the TFT with a dirty cloth, gloves, or the wrong cleaning product can create fine scratches that compromise the surface. With a protector fitted, you can clean aggressively without risking the display itself. After a few years, replace the protector — the screen underneath stays pristine. It reduces direct water contact with the display edges. A well-fitted protector overlaps the display bezels slightly, redirecting water away from the most vulnerable seal points around the screen perimeter. The cost comparison makes the decision obvious. A screen protector costs between €10 and €25. A TFT display replacement costs €700 to €1,500 or more, depending on the motorcycle. That is a return on investment measured in thousands of percent. Riders who fit a screen protector on day one of ownership — before the first ride, before the first stone chip, before the first rain — give their TFT display the best possible chance of lasting the life of the motorcycle. What to Do If You Already Have Condensation If moisture is already visible inside your display, the situation is not necessarily hopeless — but your options depend on how far it has progressed. If you see light fogging only. Park the bike in a warm, dry, ventilated space. Run the engine and let the display heat up for 20–30 minutes to encourage evaporation. Some riders have had success placing a small silica gel packet near the display housing to draw out residual moisture. Fit a screen protector immediately to prevent further surface-level water entry. If the bike is under warranty. Contact your dealer. Condensation inside a sealed TFT display is a manufacturing defect in the seal or housing. Many manufacturers — including BMW and KTM — have replaced displays under warranty for this exact issue. Document the condensation with clear photographs before your appointment. If condensation has caused staining or pixel issues. At this stage, the damage is internal and typically irreversible without replacing the display module. Get a quote from your dealer, check whether aftermarket options exist for your model, and fit a screen protector to the new unit immediately to prevent the cycle repeating. FAQ Is condensation inside my motorcycle TFT display normal? A very light, temporary fog on a cold morning that clears within minutes can occur even in a properly sealed unit. However, persistent condensation, visible droplets, or any staining is not normal — it indicates a compromised seal and active moisture ingress. Can I fix condensation inside a motorcycle display myself? If it is only light fogging, gentle heat and dry storage may resolve it temporarily. However, the seals are already compromised, so it will likely return. Full repair requires resealing or replacing the display unit, which is not a realistic DIY job for most riders. Will condensation void my warranty? No. Condensation inside a sealed factory unit is a seal failure, not user damage. Most manufacturers honour warranty claims for moisture ingress, provided there is no evidence of physical impact or tampering. Always document the issue with photos. How much does it cost to replace a motorcycle TFT display? OEM replacement costs vary significantly. BMW TFT units typically cost £700–£1,200 for the part alone, plus fitting. Honda, Yamaha, Triumph, and Kawasaki displays range from €400–€900 depending on the model. Labour adds €100–€300. Does a screen protector actually prevent condensation? A screen protector does not fix existing condensation. What it does is prevent the surface damage — stone chips, scratches, UV degradation — that causes seals to fail and moisture to enter in the first place. It is the most effective preventive measure available. Should I fit a screen protector to a brand-new bike? Yes. Day one. Before the first ride. The TFT display is at its most vulnerable when new because the seals have not yet been tested, and any early surface damage will accelerate their failure. Protecting the screen from the start is the best insurance against a four-figure repair bill down the line. Does riding in rain damage a motorcycle TFT display? Rain alone should not damage a properly sealed TFT display. The issue is cumulative: repeated exposure to rain, spray, temperature cycling, and UV gradually degrades seals over time. A screen protector significantly slows this process by shielding the most exposed surface. Protect Your Display Before It Costs You Hundreds A motorcycle TFT display is one of the most expensive single components on a modern bike — and one of the most exposed. The damage from water ingress is progressive, often invisible until it is too late, and almost always irreversible. A screen protector fitted from day one is the simplest, cheapest, and most effective way to protect that investment. Browse precision-fit motorcycle TFT screen protectors for BMW, Yamaha, Honda, Triumph, Kawasaki, and more at mr-key.com.

How to Easily Find Your Key Code for a Hassle-Free Replacement

How to Easily Find Your Key Code for a Hassle-Free Replacement

When it comes to replacing a car key , knowing your key code is essential. This code allows you to obtain a precise duplicate, ensuring that your new key fits seamlessly without any issues. Whether you've lost your key, broken it, or simply need a spare, understanding where to locate this code can make the replacement process faster and more affordable. In this guide, we’ll walk you through what a key code is, where to find it, and tips to ensure a smooth replacement process. Why Is the Key Code Important? A key code is more than just a number; it's a unique identifier that tells a key cutter exactly how to replicate your key. Without it, the process can be longer, more complicated, and potentially costly if the key doesn’t match your vehicle’s lock. Ensures a Perfect Fit : The key code guarantees that your new key will be cut to match your original one precisely. Saves Time and Money : With the correct code, you can avoid trial and error, reducing the risk of needing multiple key replacements. Improves Security : Knowing the exact specifications of your key can prevent unauthorized duplicates. Types of Key Codes Key codes come in different types depending on the key and vehicle model. Here are the main types: Direct Code : Often a 4 to 8-digit code, this code can be entered directly into a key-cutting machine for accurate replication. Indirect Code : This type of code requires a conversion chart to find the direct key code. Though indirect codes aren’t as common, they may still appear on some older models. Blind Code : Sometimes, the code may not be directly readable or is hidden in the key's design. These require decoding using a specialized tool or software. Understanding which type of code you have can make the process smoother when you’re ready to replace your key. Common Locations for Key Codes Finding the key code isn’t always straightforward, but with a few tips, you can track it down more easily. Here are the most common places to check: 1. Vehicle Manual Your vehicle’s manual often contains useful information, including the key code. It’s usually found in the section detailing the vehicle’s locking system. The manual may also provide guidance on other important security features, so it’s a great place to start. Tip : If you can’t find it in the manual, try looking in the index under “keys” or “security.” 2. Key Fob or Key Itself For some keys, the code is printed directly on the key or key fob. Look closely at the metal part of the key or the plastic casing for a small series of numbers. This code may be faint, so you may need a magnifying glass or good lighting. Tip : Be cautious when handling the key to avoid damaging the code. A worn key can sometimes obscure the code, so check carefully. 3. Vehicle Registration and Documents Some vehicle documents, especially those you receive when you first purchase the car, may include the key code. Check any paperwork related to the purchase, including sales documents, registration, and the car title. Tip : Keep these documents safe as they contain essential information for ownership and replacement needs. 4. Original Key Packaging If you have access to the original packaging of the key, such as a bag or box, the key code is sometimes printed there. This is especially common if the key came from a dealer or as part of a new car purchase. Tip : Always save key packaging, as it can provide helpful information for future reference. 5. Contacting the Dealership If you’re unable to locate the code yourself, you can reach out to the dealership where you purchased the vehicle. Dealerships often keep records of key codes, especially if the vehicle is still under warranty. Some may provide the code for free, while others might charge a fee. Tip : Have your vehicle identification number (VIN) handy when contacting the dealership, as it can help verify your ownership. Tips for Safe Key Code Storage Once you have located your key code, it’s important to keep it safe to make future replacements easier. Here are some tips: Store Digitally : Save the code in a secure document on your phone or computer. You can even use a password-protected note or cloud storage. Keep a Physical Copy : Write down the code and store it with other important vehicle documents, like your insurance and registration. Avoid Sharing the Code : Treat the key code like a password; only share it with trusted professionals when necessary for replacements. What to Do if You Can’t Find the Code If your search for the code has been unsuccessful, don’t worry—there are still options. Here’s what to do: Contact a Professional : Some professionals can create a new key by decoding the lock without needing the original key code. This is particularly helpful if you’ve lost all copies of your key. Request Assistance from the Manufacturer : In some cases, you can contact the vehicle’s manufacturer for support. They may ask for documentation proving ownership and might provide the code directly or guide you through the next steps. Benefits of Knowing Your Key Code Having the key code at your fingertips offers several advantages, whether you need a quick replacement or simply want peace of mind. Saves Time in Emergencies : If you lose your key unexpectedly, having the code handy allows for faster replacements. Lower Replacement Costs : With the exact code, key makers can avoid unnecessary recutting, saving you money. Simplifies Multiple Key Requests : If you need multiple copies, the code makes it easy to obtain several accurate replacements without errors. Locating and safely storing your key code can simplify the replacement process significantly. By knowing exactly where to look for the code and keeping it secure, you can avoid potential stress and save both time and money when the need for a replacement arises. Taking these steps now ensures that, should you ever need a new key, the process will be as smooth and efficient as possible.

Simple and Affordable Solutions for Car Key Replacement and Repairs

Simple and Affordable Solutions for Car Key Replacement and Repairs

Misplacing or damaging your car keys can be a major inconvenience, but it doesn't have to be a costly ordeal. As a car owner seeking budget-friendly and efficient solutions, understanding your options is crucial. Here's a comprehensive guide to help you navigate the process of replacing your car keys without breaking the bank. Understanding Your Car Key Type Identifying the specific type of car key you have is the first step toward an effective replacement: Traditional Metal Keys : Simple, non-electronic keys that are easy and inexpensive to duplicate. Transponder Keys : Equipped with a chip that communicates with your vehicle's ignition system for added security. Remote Key Fobs : Allow remote locking and unlocking of your vehicle, often integrated with a transponder chip. Smart Keys : Provide keyless entry and start features, utilizing advanced technology for convenience. Cost-Effective Alternatives to Dealership Key Replacement Dealerships are known for charging premium prices for key replacements. Consider these more affordable options: Professional Locksmiths : Specialize in cutting and programming various types of car keys, often at a fraction of dealership costs. Online Key Retailers : Offer replacement keys and fobs that can be purchased and then programmed either by yourself or a professional. Hardware Stores : Some stores can duplicate traditional metal keys on the spot, providing a quick and inexpensive solution. Steps to Take When You've Lost Your Car Key Losing your car key can be stressful, but following these steps can streamline the replacement process: Verify Your Vehicle Identification Number (VIN) : Locate your VIN, typically found on the dashboard or inside the driver's side door, as it is essential for key replacement. Gather Necessary Documentation : Prepare proof of ownership, such as your vehicle registration and personal identification. Contact a Professional : Reach out to a reputable locksmith or key replacement service with your vehicle details to obtain a new key. Removing a Broken Key from the Ignition or Door Lock A broken key can be a frustrating obstacle. Here's how to address it: Use Needle-Nose Pliers : If a portion of the key is protruding, gently extract it using pliers. Apply Lubricant : Spray a graphite-based lubricant into the lock to ease the removal process. Seek Professional Assistance : If the key fragment is lodged deep or these methods fail, contact a locksmith to prevent further damage. Preventative Measures to Avoid Future Key Issues Keep a Spare Key : Having a duplicate stored safely can save time and money in emergencies. Regular Maintenance : Inspect your keys and locks periodically for signs of wear and address issues promptly. Use Key Protectors : Invest in key covers or cases to minimize physical damage.

Top 10 Most Common Car Key Problems (And How to Fix Them)

Top 10 Most Common Car Key Problems (And How to Fix Them)

Car keys have changed dramatically in the last 20 years. What was once a simple mechanical tool has become an essential electronic device packed with functionality. From remote locking and trunk opening to push-start ignition systems and proximity sensors, today's car keys do a lot more than just turn in the ignition. However, this increased functionality also means more components that can fail—and when they do, the inconvenience can be frustrating or even immobilizing. For many drivers, key problems seem to come out of nowhere. A button stops working, the car doesn’t start, or a backup key won’t respond. Understanding the most common issues with modern car keys can help you avoid unnecessary trips to the dealership and identify quick fixes at home. Below, we’ll explore the ten most frequent car key problems, how to recognize the symptoms, and what steps to take to get your key working again—often without spending a fortune. 1. The Key Fob Has Stopped Responding One of the most common complaints drivers have is that their key fob simply stops responding. The remote may no longer lock or unlock the vehicle, the trunk button might stop working, or there may be no visible LED indicator when you press a button. In most cases, the culprit is a dead battery—something that’s inexpensive and easy to replace. Most key fobs use a CR2032 coin-cell battery, which can typically be changed with a small screwdriver or a plastic pry tool. If replacing the battery doesn’t bring the fob back to life, the issue may be with the internal electronics. Moisture, drops, and general wear over time can corrode or damage the tiny circuit board inside. In such cases, replacing the outer shell might not be enough—you may need to invest in a full replacement or transplant the electronics into a new case if only the buttons or housing are damaged. 2. The Car Doesn't Detect the Key Another increasingly common issue—especially in vehicles with push-to-start systems—is that the car doesn’t detect the key, even though it's inside the cabin or close to the sensor. You might see a warning on the dashboard such as “Key Not Detected” or “No Key Present.” This can happen due to a nearly dead battery in the fob, radio frequency interference from nearby electronics, or a fault in the key’s transponder chip. The first step is always to replace the key’s battery. If the issue persists, try holding the key closer to the start button or steering column—some vehicles have hidden backup sensors that detect the key at close range in emergencies. If none of that works, the problem could be with the chip inside the fob or the vehicle’s receiver, requiring diagnosis by a qualified locksmith or dealership technician. 3. The Key Turns in the Ignition, But Nothing Happens This issue is particularly frustrating: you insert your key into the ignition, it turns freely, but the car doesn’t respond at all. Often, this is a sign that the vehicle’s immobilizer system isn’t recognizing the key. Modern car keys contain a small RFID chip that communicates with the car’s anti-theft system. If this chip is damaged or unprogrammed, the vehicle will not start—no matter how well the mechanical part of the key works. Try using a spare key if you have one. If the backup works, you’ll know the issue lies within the primary key. If neither key works, the problem could be with the vehicle’s receiver, antenna ring, or immobilizer control unit. A professional diagnostic scan is typically needed to pinpoint the cause. 4. The Key Won’t Turn in the Door or Ignition If your key suddenly stops turning in the door or ignition cylinder, the cause may be as simple as wear and tear. Key blades—especially older ones—can become worn down over time, resulting in poor contact with the internal pins in the lock. Dirt, rust, or debris inside the lock can also prevent the key from turning, particularly if the vehicle hasn’t been manually unlocked in a while. First, try using a backup key. If it turns smoothly, your main key is likely worn. If both keys struggle, apply a non-residue contact cleaner or lock lubricant to clean out the cylinder. For long-term solutions, you may need to replace either the key blade or the ignition/door lock entirely. Don’t attempt to force the key, as this could cause the blade to bend or snap inside the lock. 5. The Buttons Feel Mushy or Stuck Physical wear is one of the most overlooked causes of key fob failure. Over time, the rubber buttons on your remote can wear down, become loose, or stop pressing properly. You might notice that only one or two buttons respond, or that they must be pressed harder than usual to work. In many cases, the outer shell has simply degraded, while the electronic board inside remains perfectly functional. The most effective fix is to replace the key shell. These replacement housings are inexpensive and widely available for most major vehicle brands. Simply open the fob, transfer the circuit board, battery, and buttons into the new shell, and your key will feel and function like new again—without any need for reprogramming. 6. Your Key Fob Got Wet Water and electronics rarely mix well, and key fobs are no exception. Whether your key was left out in the rain, fell into a puddle, or went through the washing machine, moisture can quickly short-circuit the internal components or lead to long-term corrosion. If your key gets wet, act fast. Remove the battery immediately and open the case to allow air circulation. Use desiccants such as silica gel packets to dry out the internal parts—avoid using rice, which is far less effective. If corrosion is visible, gently clean it with isopropyl alcohol and a cotton swab. If the key still doesn’t work after drying, the damage may be permanent and require replacement. 7. The Key Shell Is Cracked or Broken Keys endure daily use, pocket pressure, accidental drops, and exposure to the elements. Over time, the plastic casing of the fob can crack, split, or completely fall apart, leaving internal electronics vulnerable. Although a broken shell doesn’t necessarily mean the key is non-functional, it can make usage difficult and risky. Thankfully, key shell replacements are an easy and budget-friendly solution. You can often reuse all your original components, including the battery, buttons, and transponder chip. Replacing just the shell avoids costly reprogramming and restores your key’s durability and appearance. 8. The Key Still Doesn’t Work After Replacing the Battery Replacing a fob battery is supposed to solve the problem—but sometimes it doesn’t. If your remote remains unresponsive after a battery change, you may have installed the wrong type of battery, inserted it incorrectly, or failed to clean the contact points inside the fob. In some cases, the circuit board itself may be damaged or shorted out. Double-check that the battery type matches the original (commonly CR2032). Ensure it’s properly seated and that the metal contact tabs are clean and secure. If the problem continues, the issue likely lies with the circuit board, and the fob may need to be replaced entirely. 9. You’ve Lost Your Only Key Few things are more stressful than losing your only car key—especially if you don’t have a spare. Most modern vehicles require the key to be electronically paired with the car, so simply cutting a new blade isn’t enough. You’ll need your Vehicle Identification Number (VIN), proof of ownership, and a visit to either a dealership or a certified locksmith. Some aftermarket services can offer replacement keys that are compatible with your vehicle at a lower price than the dealership. Once the new key is cut and programmed, be sure to create and safely store a backup key to avoid being locked out in the future. 10. The Spare Key Doesn’t Work Anymore Spare keys are often kept in drawers or glove compartments for years without use. When finally needed, many drivers are surprised to find that the backup key doesn’t work. Batteries may have died, circuit boards may have degraded, or the key may have fallen out of sync with the vehicle. Start by replacing the battery. If that doesn’t work, the spare may need to be reprogrammed to the car. Keeping your spare key in a safe, climate-controlled environment and testing it occasionally is the best way to ensure it's ready when needed. Car key problems can range from mildly inconvenient to seriously disruptive—but the majority are entirely fixable, often at home and at minimal cost. Understanding the common causes behind these issues allows you to respond quickly, avoid dealership prices, and extend the life of your keys. At mr-key.com , you’ll find a wide selection of replacement key shells , batteries , blades , and complete electronic keys compatible with dozens of vehicle brands. With proper care and the right tools, you can keep your key in excellent condition and avoid ever being stranded due to a faulty fob.

Chat with us