Post Name

 Losing a Volkswagen key is stressful. It usually happens at the worst possible moment—before work, during travel, or far from home. Modern VW keys are no longer simple pieces of metal. They combine electronics, immobiliser chips, and precision-cut blades. When a lost car key situation happens, knowing the right steps saves time, money, and frustration.

 This guide explains exactly what to do if you lose your VW key, how to secure your vehicle, and how to get a proper VW key replacement without unnecessary delays.


Stay Calm and Check the Obvious First


Before assuming your VW key is gone for good, pause.

Keys are often misplaced, not stolen.

Check:

Jacket and trouser pockets

Bags and backpacks

Around the car, driveway, or parking area

Home entry points and recent stops

Many VW keys are lost nearby and found within minutes. If the key truly cannot be located, move to the next step.

Secure Your Volkswagen Immediately


If you suspect the key is lost in a public place, vehicle security becomes the priority.

Modern Volkswagen keys communicate with the car via encrypted signals. While this offers protection, losing a key still creates risk.

What to do:

Lock the vehicle if possible

Avoid leaving the car unattended for long periods

Do not delay replacement if the key cannot be recovered

The fewer active keys exist for your vehicle, the safer it remains.

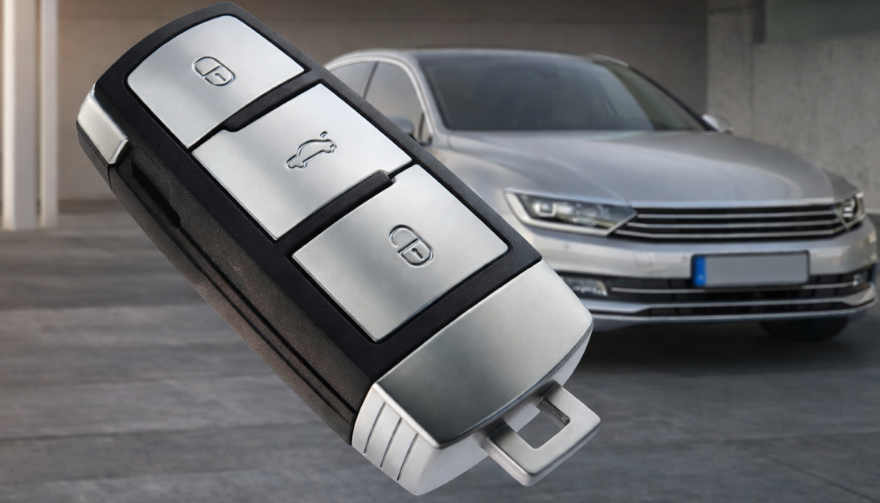
Identify What Type of VW Key You Lost


Not all Volkswagen keys are the same. Knowing what you lost helps you choose the correct replacement.

Common VW key types include:

Mechanical keys (older VW models)

Transponder keys (chip-based immobiliser keys)

Remote flip keys

Smart / proximity keys (keyless entry systems)

You can usually identify your key type by:

The year of the vehicle

Whether it had buttons

Whether the car starts with a traditional ignition or push-start

This information ensures you order the correct VW key replacement.

Why a Spare Volkswagen Key Matters More Than You Think


Many VW owners only realise the importance of a spare after losing their only key.

A spare key:

Prevents vehicle immobilisation

Reduces stress during travel

Makes replacement faster and simpler

Acts as a backup for emergencies

Relying on a single key is one of the most common and avoidable mistakes VW drivers make.

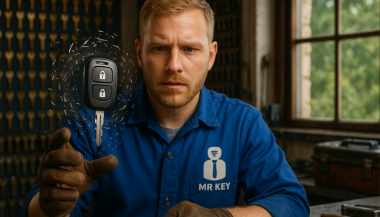
Replacing a Lost Volkswagen Key the Smart Way


A VW key replacement does not always require the original key.

At mr-key.com, you can order replacement Volkswagen keys, fobs, and key cases designed to match your exact model.


Available solutions include:


Replacement VW key shells and fobs

New key blades cut to match your vehicle

Keys cut from a photo of the original

Keys cut from a code, where available

This allows you to restore access even if the original key is completely lost.


Important: Electronic keys may still require programming after cutting, depending on the model.

How VW Keys Can Be Cut Without the Original


Many drivers assume a missing key makes replacement impossible. That is not true.

VW keys can often be cut:

From a clear photo of the original key blade

From a key code linked to the vehicle or lock

This method restores the physical function of the key with high precision. It is especially useful when no spare key exists.


More information on official VW security and immobiliser systems can be found on the Volkswagen website

Protect Your Replacement VW Key


Once you replace a lost VW key, protect it properly.

Simple habits make a big difference:

Use a protective key case

Avoid placing keys loosely in bags or pockets

Keep a spare key stored safely at home

Small steps prevent repeat key loss—and repeat stress.


Frequently Asked Questions


Can I replace a Volkswagen key without the original?

Yes. A VW key replacement is possible even without the original key. Keys can be cut from a photo or code, depending on the model.

What should I do if I lose my only VW key?

Secure the vehicle first. Then order a replacement key as soon as possible to avoid being locked out or immobilised.

Are all VW keys the same?

No. Volkswagen uses different key types depending on model and year, including mechanical, transponder, remote, and smart keys.

Does a replacement VW key need programming?

Some VW keys include electronic chips that require programming. Cutting the key restores physical access, while programming enables full functionality.

Why is having a spare VW key important?

A spare key saves time, stress, and complications if your main key is lost or damaged.


For independent vehicle security standards and best practices, see guidance from recognised automotive organisations such as ADAC

If you’ve lost your Volkswagen key or want to avoid future problems, explore VW key replacements, fobs, cases, and key cutting services at mr-key.com and secure your vehicle the smart way.

Related Posts

Car Won’t Start After Key Shell Change? Here’s What the Transponder Chip Does

Car Won’t Start After Key Shell Change? Here’s What the Transponder Chip Does

Modern car keys have come a long way from the traditional cut metal blades of the past. What was once a simple tool for turning an ignition has evolved into a smart, encrypted device with layers of built-in security. Among the most critical components in today’s car keys is the transponder chip — a small but vital element that could be the reason your car doesn’t start after replacing your key shell. If you've recently changed the shell or casing of your key and suddenly find that your car won’t start, you're not alone. This is one of the most common (and frustrating) issues car owners face when performing a key repair or upgrade. So let’s break down what’s really happening — and how you can fix it. What Is a Transponder and What Does It Do? A transponder chip (short for “transmitter-responder”) is a small electronic component embedded in your car key. Its purpose is to communicate with your vehicle’s immobilizer system to authorize ignition. Here’s how it works: When you insert your key and turn the ignition, your car sends out a radio signal. The transponder chip in your key responds with a coded signal unique to your car. If the code is correct, the car’s computer disables the immobilizer and allows the engine to start. If the chip is missing, broken, or the code doesn’t match — the engine won’t start, even if the key blade physically turns. This system is an anti-theft measure, and it's present in most vehicles manufactured after the late 1990s. Without a functional transponder, your key may unlock the doors but it will not allow the car to start. This ensures that even if someone manages to copy the physical blade of your key, they still can’t steal your car. Why Your Key Might Not Work After Shell Replacement Changing your key shell (also called a case or housing) can seem like a simple cosmetic repair — but it’s easy to overlook the importance of transferring the transponder chip during the process. If your key no longer starts the car after a shell replacement, the most likely reason is: You forgot to move the transponder chip into the new shell. In many keys, the chip is not part of the electronics board . It’s often a tiny black or glass capsule , sometimes hidden in a small compartment within the key shell — completely separate from the buttons and battery. If you didn’t see it, it’s probably still sitting inside the old casing. Some people assume that simply moving over the circuit board and battery is enough — but without the transponder, your key won’t be recognized by the car’s immobilizer. This results in the engine failing to start, even though the buttons may still lock and unlock the doors. Symptoms of a Missing or Misplaced Transponder If your key turns in the ignition but: The car does not crank or start You see a flashing key icon or immobilizer warning on the dashboard The central locking might still work, but the engine won’t respond You hear a clicking sound but no ignition occurs Then it’s almost certainly a transponder issue. The car's system is waiting for a valid coded signal from the key — and without it, the start command is rejected. How to Fix It: What You Need to Do Here’s how to get your car running again: 1. Check Your Old Key Shell Open the old casing and look for a small black or clear capsule (typically rice-sized). That’s your transponder chip. Some are glued in place and may require careful prying. 2. Transfer the Chip Carefully remove it and insert it into the correct compartment in your new key shell. Some aftermarket shells have a specific slot for it, while others require a bit of creativity to keep it securely in place. In some cases, adhesive putty or double-sided tape can help hold it. 3. Reassemble and Test Put your key back together and try starting the car again. If the chip is correctly placed, it should work immediately — no reprogramming needed. Always test both ignition and door lock/unlock functions. What If You Lost the Chip? Unfortunately, if the chip is damaged or lost, the key will no longer be able to start your vehicle. In this case, you’ll need to: Contact a professional auto locksmith Have a new transponder chip programmed to your car’s immobilizer system Provide proof of ownership (such as your vehicle logbook or registration) in most cases Depending on the make and model of your car, programming a new chip may cost anywhere from $50 to $250 , and it typically requires special diagnostic equipment. It’s worth noting that some dealerships may charge significantly more than independent auto locksmiths — and you may have to wait longer for service. Pro Tips When Replacing Your Key Shell Always examine the inside of your old shell carefully before throwing it away. Take photos before disassembly so you know where each component goes. If you're unsure where the chip is or how to transfer it, look for DIY videos specific to your key model. Use tweezers and caution — the chip is fragile. Avoid static electricity or contact with magnets during the transfer process. Some modern keys have transponders integrated into the circuit board , in which case no separate chip needs to be moved. If you’re working with a smart key or proximity key, additional steps may be required. These typically involve re-synchronization with the vehicle’s system and may not function correctly without professional assistance. Small Chip, Big Consequences It’s incredible how something as small as a transponder chip can control such a major function. Replacing your key shell is a great way to refresh the look and feel of your key — but it’s vital not to overlook the importance of transferring every component, especially the transponder. Many DIY repairs are abandoned or lead to confusion simply because of this overlooked step. Fortunately, it’s one of the easiest problems to fix once you understand what to look for. If your key looks brand new but your car won’t start, don’t panic. Chances are, the solution is sitting inside your old key shell — quietly waiting to be moved over.

The Top 5 Car Key Emergencies and How to Handle Them

The Top 5 Car Key Emergencies and How to Handle Them

When it comes to car keys , emergencies often strike at the worst possible moments. Whether you’re rushing to work, stuck at a grocery store, or stranded in an unfamiliar location, knowing how to handle these situations can save you time, stress, and money. Below are the five most common car key emergencies and practical solutions to get you back on track. 1. Locked Out of Your Car? Here’s What to Do Locking your keys inside your car is a common yet frustrating mistake. The good news? There are ways to regain access without breaking the bank—or your window. Check for Spare Keys: If you have a spare key, now is the time to use it. Always keep one in a secure but accessible location, like with a trusted friend or at home. Use a Slim Jim or Unlocking Tool: While not ideal for everyone, these tools can work if you’re familiar with their use. However, be cautious to avoid damaging your car. Call a Locksmith or Roadside Assistance: Professional services can unlock your car safely and quickly. While it might cost you, it’s often cheaper than repairing a broken window. Pro Tip: Many modern cars come with apps or key fobs that allow remote unlocking. Familiarize yourself with these features beforehand. 2. Key Stuck in the Ignition? Don’t Panic A key stuck in the ignition can leave you feeling helpless, but with the right steps, you can often fix the issue yourself. Check the Gear Position: Ensure the car is in “Park” or “Neutral.” Many cars prevent key removal unless the gear is correctly positioned. Inspect for Steering Wheel Lock: Wiggle the steering wheel gently while trying to turn and remove the key. A locked steering wheel might be the culprit. Lubricate the Lock: Use a small amount of graphite lubricant to loosen the ignition lock. Avoid oil-based lubricants as they can attract dirt. Seek Professional Help: If the key is still stuck, call a locksmith or mechanic to prevent further damage. 3. Lost Your Key Fob Without a Spare? Act Fast Losing your key fob with no backup can be a nightmare, especially if your car relies on it entirely. Contact a Locksmith: Many locksmiths can program a new key fob on the spot, often at a lower cost than going to a dealership. Order a Replacement: Some car manufacturers allow you to order a replacement key fob online. Be prepared to provide proof of ownership. Preventative Measures: Always have a spare key fob and store it in a safe location. Consider investing in a key tracker to avoid future mishaps. 4. Dealing with a Wet or Damaged Key Fob? Accidents happen—maybe your key fob went through the wash or got drenched in the rain. The good news? Not all is lost. Dry It Out: Remove the battery and place the key fob in a bag of rice or silica gel to absorb moisture. Let it sit for at least 24 hours. Replace the Battery: Water damage can short-circuit the battery, so replace it with a new one after drying the fob. Test the Fob: After reassembling, check if the fob functions properly. If not, you may need to replace it or have it repaired by a professional. 5. Dead Key Fob Battery in a Remote Location? A dead key fob battery can leave you stranded, but this issue is often easier to resolve than you might think. Check for Hidden Features: Many cars have an emergency key hidden in the fob itself. This can manually unlock the door. Push-Button Start Workaround: Some cars allow you to start the engine by holding the dead fob close to the start button. Carry a Spare Battery: Always keep a spare CR-type battery in your glove box for quick replacements. These are inexpensive and widely available. Pro Tip: Familiarize yourself with your car’s manual to learn emergency procedures for dead key fobs. General Tips to Prevent Car Key Emergencies Preparation is your best defense against car key emergencies. Follow these tips to avoid getting caught off guard: Keep a Spare Key Handy: Store it at home, with a trusted person, or in a secure, hidden location. Invest in a Key Tracker: Attach a Bluetooth-enabled tracker to your key fob for easy location via your smartphone. Regular Maintenance: Replace key fob batteries proactively and inspect your keys for wear and tear. Learn Emergency Features: Understand your car’s built-in features, such as remote unlocking or hidden keys, to save time in emergencies. Stay Prepared, Stay Calm Car key emergencies don’t have to derail your day. With a little preparation and knowledge, you can tackle these common scenarios with confidence. Whether it’s unlocking your car, replacing a battery, or dealing with a damaged key fob, taking proactive measures ensures you’re always one step ahead.

How to Remove or Change a Roof Rack Lock Barrel Easily

How to Remove or Change a Roof Rack Lock Barrel Easily

Changing or removing the lock barrel on your roof rack may seem like a daunting task, but it’s actually simpler than you might think. Whether you need a replacement due to a lost key, wear and tear, or just want to swap out an old lock for a new one, following the right steps can make the process hassle-free. This guide will walk you through everything you need to know about handling a roof rack lock barrel with ease. Why You Might Need to Change a Roof Rack Lock Barrel ? There are several reasons why you may want to replace or remove your roof rack lock barrel: Lost Key : If you've misplaced the key, replacing the lock barrel is often the most practical solution. Upgrading the Lock : Maybe you want a more secure lock for added peace of mind. Routine Maintenance : Over time, lock barrels can wear down, making it harder to insert or turn the key. Uniformity : If you've recently changed your car key, you may want to match your roof rack lock with it. Knowing why you’re changing the lock barrel will help you determine the steps you need to follow. What You’ll Need Before you start, gather these essential tools and items: Replacement Lock Barrel : Ensure it’s compatible with your roof rack model. Master Key or Removal Key : Often required to remove the old lock barrel. New Key : The key that corresponds to the replacement lock barrel. Flathead Screwdriver : To gently pry and release certain parts if needed. Step-by-Step Guide to Removing a Roof Rack Lock Barrel Removing a lock barrel from your roof rack doesn’t require extensive mechanical skills. Just follow these straightforward steps: 1. Locate the Lock Barrel The lock barrel is usually situated in the center or side of the roof rack. Look for the small lock with the keyhole, as this is where you'll be inserting the master or removal key. 2. Insert the Master Key or Removal Key If you have a master or removal key, insert it into the lock. This is often a universal key provided by the lock manufacturer specifically for removing lock barrels. Once it’s inserted, turn the key slightly to unlock the barrel. Tip: If you don’t have a removal key, contact a professional or see if you can order one specifically for your model. 3. Pull the Lock Barrel Out With the removal key still in place, gently pull the lock barrel out. If it’s resistant, try wiggling it slightly while pulling. Avoid forcing it, as this could damage the lock or roof rack. In some cases, you may need a flathead screwdriver to help pry it out, but be careful not to scratch the surrounding area. 4. Check the Casing After removing the lock barrel, inspect the casing where the barrel was installed. Make sure it’s clean and free of debris. Any dirt or rust could interfere with the new lock barrel, so it’s a good idea to clean this area before proceeding. Installing the New Lock Barrel Once the old barrel is removed, you’re ready to install the new one. Here’s how: 1. Align the New Lock Barrel Take your new lock barrel and align it with the casing where the old one was. Most barrels are designed to fit in only one direction, so make sure you align it properly to avoid jamming. 2. Insert the New Barrel Push the new lock barrel into the casing until it clicks into place. This might require a bit of pressure, but it should fit snugly without needing excessive force. 3. Test the New Key After installing the new lock barrel, insert the new key and turn it to ensure it’s working smoothly. The key should turn easily and lock securely. This step verifies that the new lock is properly aligned and functional. Common Challenges and Solutions While changing a roof rack lock barrel is generally straightforward, you might encounter some challenges. Here’s how to troubleshoot common issues: Stuck Barrel : If the old barrel is stuck, apply a lubricant like WD-40 around the lock to help loosen it. No Removal Key : If you don’t have a master or removal key, consider reaching out to a locksmith or checking if the manufacturer offers a replacement. Barrel Won’t Fit : Ensure you’ve purchased a compatible lock barrel. Even slight differences in design can prevent it from fitting properly. Tips for Maintaining Your Roof Rack Lock To keep your new lock barrel in good condition and prevent the need for frequent replacements, consider these maintenance tips: Regular Cleaning : Dirt and grime can accumulate inside the lock over time, making it harder to operate. Clean the lock regularly to prevent this. Use Lubricant : Apply a small amount of lubricant inside the lock barrel periodically to keep the key turning smoothly. Protect from Rust : If your roof rack is exposed to rain and humidity, use a protective cover or shield to keep moisture out of the lock barrel. Check Key Fit : Avoid using a damaged or bent key, as this can wear out the lock barrel more quickly. When to Seek Professional Help In some cases, removing or replacing a roof rack lock barrel might require assistance from a professional: Lost or Damaged Keys : If both your main key and master key are lost or damaged, a professional can help retrieve or replace the lock barrel. Damaged Lock Mechanism : If the lock itself is damaged or jammed, forcing it can make things worse. A professional locksmith can safely remove and replace it. Replacing or removing a roof rack lock barrel is an affordable and manageable task for most car owners. By following the right steps and keeping up with regular maintenance, you can ensure your roof rack lock stays functional and secure. Whether you’re upgrading for security or replacing a worn-out lock, a new lock barrel can make all the difference in keeping your roof rack safe. Effortless Key Replacement for a Variety of Locks Order 2x Union Keys FT Series, custom-cut to your original key code, for a hassle-free replacement. Compatible with a range of locks, including those from Aston Martin, Jaguar, Land Rover, and more, these keys are perfect for classic cars, caravans, petrol caps, roof racks, and truck canopies. Simply find your lock code (e.g., FT101-FT360) on the lock face and enjoy fast delivery of high-quality spare keys.

What You Need To Know About BMW  Swirl Flaps and How To Solve The Problem With Them

What You Need To Know About BMW Swirl Flaps and How To Solve The Problem With Them

Swirl flaps are a BMW system that has been introduced to help burn the fuel mixture in the cylinder better due to the fact that diesel engines do not have throttle valves and it is not possible to adjust the air-fuel ratio. A diesel engine without vortex valves operates between a poor and a rich fuel mixture, because the only way to regulate it is through fuel injection. Design of the first generation swirl flaps that are made of made of metal. Unfortunately, swirl flaps are responsible for countless damaged engines and costly repairs due to design errors or metal fatigue. Once damaged, the cylinder sucks them in and causes great damage. This is how damaged valves damage the cylinder. Typical swirl flaps suction damage. The vortex valves are positioned in the inlet and are controlled by vacuum (DDE 4.0) or electrically (DDE5.0 / DDE6.4) by the engine ECU. Effects of malfunctioning valves: Swirl valves are stuck in open position: Deterioration of exhaust gas performance at lower speeds. Swirl valves are stuck in closed position: Approximate power loss of 10% at high engine speeds. How swirl flaps work: Performance characteristics: The vortex valves are in the closed position, at low engine speeds and small amounts of fuel injected (controlled by the ECU card). They open under the following conditions: coolant temperature <14 ° C OR * fuel quantity> 24 mg OR engine speed 2250 rpm OR inlet air temperature <-5 ° C BMW and Pierburg have decided to produce diesel engines with metal vortex valves. The speed at which the pistons in the diesel engine operate is at least 60 rpm, so a sucked vortex valve will break and cause a number of damages inside the engine. In most cases, one or more pistons are severely damaged, as a bonus you get valves, in some cases a head or turbocharger. And this combination with a BMW engine is like a cumulative jackpot 🙂 In 2004, BMW began work on the problem and improved the design, however, a number of owners reported ongoing problems in this area. The solution to this problem is by removing the vortex valves and plugging, which does not affect the performance of the engine and at the same time, you can safely pass the exhaust test. Engines: M47 (136hp VP44 fuel pump) has no valves. M47N common rail engine (including M47N / M47TU / M47TUD20) (150hp. Face lift model from 2001 -) has valves. M57 engines (M57D) (525d & 187hp. 330d) cars with manual transmission do not have valves, but those with automatic have. M57N engines (M57TUD) (525d & 330d 204hp) have vortex valves. Ruined swirl flaps: The plugs that replace the vortex valves are easy to find on the internet, but you can also find them here on our website. Typical plugs: Disassembly of vortex valves: The vortex valves can be safely dismantled and in most cases if they are removed properly no loss of power is felt. Final list of models for which vortex valves are installed: Engine: M47N/M47TU/M47TUD20 Applications: * 110 kW (148 hp) and 330 N·m (243 lb·ft) o E46 320d 2001-2005 o E83 X3 2.0d (up to end of 2006) Engine: M47TU2D20 The engine was updated again in 2004 as the M47TU2D20. Still at 1995 cc, it produced more power across the range. Applications: * 120 kW (161 hp) and 340 N·m (251 lb·ft) E60/E61 520d E87 120d E90/E91 320d E83 X3 2.0d (end of 2006 onwards) Engine: M57/M57D25 M57D25 was introduced in 2000. Applications: * 166 PS (122 kW; 164 hp) at 4000 rpm, 350 N·m (260 lb·ft) at 2000-2500 rpm with a 4750 rpm redline, models: 2000-2003 E39 525d *Vehicles With Automatic Transmission ONLY* Engine: M57N/M57TU/M57TUD25 M57TUD25 was introduced in 2004. Applications: * 177 PS (130 kW; 175 hp) at 4000 rpm, 400 N·m (300 lb·ft) at 2000-2750 rpm models: E60/E61 525d Engine: M57/M57D30 M57D30, also called M57D29, was introduced in 1998. Applications: * 184 PS (135 kW; 181 hp)@4000, 390 N·m (290 lb·ft)@1750-3200 models: E39 530d *Vehicles With Automatic Transmission ONLY* E46 330d/330xd *Vehicles With Automatic Transmission ONLY* * 184 PS (135 kW; 181 hp)@4000, 410 N·m (300 lb·ft)@2000-3000 models: E38 730d *Vehicles With Automatic Transmission ONLY* E53 X5 3.0d * 193 PS (142 kW; 190 hp)@4000, 410 N·m (300 lb·ft)@1750-3000 models: E38 730d E39 530d Engine: M57N/M57TU/M57TUD30 M57TUD30 was introduced in 2002. It originally produced 160 kW (215 hp) at 4000 rpm and 500 N·m (370 lb·ft) at 2000-2750 rpm, but was tweaked for 150 kW (201 hp) at 4000 rpm and 410 N·m (300 lb·ft) at 1500-3250 rpm for 2003 and again for 200 kW (268 hp) at 4000 rpm and 560 N·m (410 lb·ft) at 2000-2250 rpm in 2004. Applications: * 204 PS (150 kW; 201 hp)@4000, 410 N·m (300 lb·ft)@1500-3250 models: E46 330d/330Cd/330xd E83 X3 3.0d * 218 PS (160 kW; 215 hp)@4000, 500 N·m (370 lb·ft)@2000-2750 models: E53 X5 3.0d E60/E61 530d/530xd E65 730d * 272 PS (200 kW; 268 hp)@4000, 560 N·m (410 lb·ft)@2000-2250 E60/E61 535d * 245 PS (180 kW; 242 hp)@4000, 500 N·m (370 lb·ft)@2000-2250 * 286 PS (210 kW; 282 hp)@4000, 580 N·m (430 lb·ft)@2000-2250 Engine: M57TU2D30 M57TU2D30 was introduced in 2007, making its debut in the facelifted E60 and E61. * M57TU2D30-UL: 197 PS (145 kW; 194 hp) * M57TU2D30-OL: 235 PS (173 kW; 232 hp)@4000, 500 N·m (370 lb·ft)@2000-2750 * M57TU2D30-TOP: 286 PS (210 kW; 282 hp), 580 N·m (430 lb·ft) Applications: * 197 PS (145 kW; 194 hp), 400 N·m (300 lb·ft) models: E90/E91/E92 325d E60/E61 525d/525xd * 231 PS (170 kW; 228 hp)@4000, 500 N·m (370 lb·ft)@2000-2750 models: E65 730d E90/E91 325d E90/E91 330d/330xd * 235 PS (173 kW; 232 hp) models: E60/E61, BMW E70, BMW E71 * 286 PS (210 kW; 282 hp), 580 N·m (430 lb·ft) models: E60/E61 535d E70 X5 3.0sd E71 X6 xDrive35d E83 X3 3.0sd E90/E91 335d The above models are listed for information only if you want to to make sure your engine has valves installed, please contact a competent person. Please note that the information described above is for informational purposes only and does not claim to be reliable. Mr-key.com is not responsible for any repair work you undertake that is related to the topic described in this article.

Chat with us