Post Name

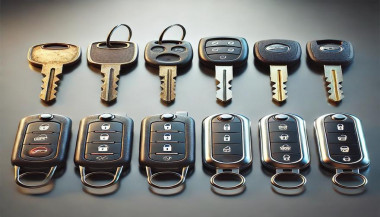
There’s nothing quite as frustrating as standing outside your car, key in hand, only to realize something’s not working. Whether your key won’t turn, the remote isn’t responding, or the key itself has seen better days, car key problems seem to happen at the worst possible moment. The good news? Most of these issues are avoidable or fixable, and knowing what to expect can save you both time and stress.

1. Worn-Out Key Blades

You might not notice it happening, but over time, your key blade wears down. Each time you insert it into the lock or ignition, tiny grooves and cuts on the blade experience friction. After years of use, the edges get smooth, and the key may stop fitting snugly. Suddenly, you find yourself jiggling or forcing it, risking more damage.

The solution here is simple: if you start noticing that the key feels loose or takes a few tries to turn, it’s time to get a replacement cut based on the original code, not by copying the worn-out key. A fresh, precisely cut key blade will fit and function perfectly, preventing damage to your lock cylinder.

2. Dead Key Fob Battery

Modern cars often come with remote keys or keyless entry systems, and while they offer convenience, they also rely on tiny batteries. One day, you press the button, and nothing happens—no lights, no unlock sound, no response.

Before assuming the worst, check the battery. Typically, key fob batteries (like CR1620 or CR2032 types) are inexpensive and easy to replace. A quick change will often restore full functionality. Make it a habit to change your key battery every 1-2 years, especially if you notice reduced range or need to press the button multiple times.

3. Key Not Turning in the Ignition

You get into your car, insert the key, and suddenly it won’t turn. You might try wiggling the steering wheel or pushing the key harder, but nothing works. More often than not, the problem is either with the steering lock mechanism being engaged or dirt buildup inside the ignition cylinder.

First, try gently moving the steering wheel side-to-side while turning the key—sometimes the wheel locks under tension, and this simple trick unlocks it. If the problem persists, there could be debris inside the ignition. Using a can of compressed air to blow out dust and tiny particles can help, but if it continues, a professional cleaning or inspection might be necessary before the key or ignition gets damaged.

4. Broken or Bent Keys

You might not think twice when you use your key to open a package or pry something open—but keys aren't made for multitasking. Over time, rough handling, bending, or dropping your key can weaken the metal. Eventually, you could end up with a bent key that struggles to fit, or worse, a snapped key stuck in your lock.

If your key has visible bends or cracks, don’t wait. Replacing it before it breaks entirely can save you the headache of needing an extraction service. Also, always carry a spare key, just in case.

5. Key Programming Issues

If your car uses a transponder key or a smart key, there’s more than just a metal blade involved. Inside is a chip programmed to communicate with your car’s immobilizer system. If your key loses synchronization—maybe after battery replacement, an electrical issue, or accidentally resetting your system—it can leave you unable to start your vehicle.

In these cases, reprogramming the key is necessary. Some cars allow you to do this manually following specific sequences (like turning the ignition on and off), but others require specialized diagnostic tools. Familiarizing yourself with your car’s manual or researching the process beforehand helps avoid surprises.

6. Water Damage

Dropped your key in water or left it exposed to rain? Electronics inside remote keys and smart keys aren’t waterproof. Moisture can short-circuit internal components, causing the key to stop functioning entirely.

If this happens, act fast. Remove the battery immediately and dry out the key as thoroughly as possible. You can use silica gel packets or place the key in a bowl of rice overnight to absorb moisture. However, water damage isn’t always reversible, so keeping your key away from wet environments is the best precaution.

Car key problems often feel like an emergency when they strike, but most of them are preventable or quickly fixable with a little know-how. Paying attention to the warning signs—whether it’s a key that’s worn, a fob that’s sluggish, or a key that won’t turn—allows you to act before things escalate. Understanding how your key works and handling it with care will save you from unnecessary stress (and unexpected expenses) down the road. So next time something feels off with your key, remember: a little attention now can prevent a major hassle later.

Related Posts

What to Do If You Lose Your Car Keys While Travelling?

What to Do If You Lose Your Car Keys While Travelling?

1. Why this happens and why you must act fast Losing car keys while travelling is more common than you might assume. Whether it’s slipping out of a beach bag, leaving them at a café or dropping in transit, your vehicle becomes vulnerable. In addition, modern keys increasingly contain electronic transponders , chips or fobs—meaning replacement cost and complexity shoot up. When you’re away from home, both the stress and the stakes increase: you may face towing, expensive replacements or worse — being stranded. The sooner you act the less time you give for theft, theft-of-opportunity or further cost escalation. 2. Immediate steps when you realise your keys are missing a) Stay calm and retrace your steps Start by pausing. Panic hampers clear thinking. Consider the last time you remember using your keys: in the car, on unloading luggage, at hotel reception. Retrace your route slowly. As RAC advise, this step often resolves the problem without cost. b) Search systematically Check all pockets, bags, seats, coat hangers, beach bags, under cushions, in and around your car. If you’re staying somewhere temporarily, check hotel rooms, fuelling stations, parking lots. As one travel-site suggests: “Go through all your pockets… look around all surfaces in your hotel room”. c) Contact places you visited Call restaurants, cafés, shops, airport parking or hotels where you parked the vehicle. Key finders are often handed in. d) Assess risk of theft If you suspect the keys were stolen (pick-pocket, hotel burglary or unattended vehicle) you should alert local police and your insurance provider—once a key is missing, your vehicle security is compromised. e) Secure the vehicle If the vehicle is parked in an insecure location, consider moving it (if possible) or arranging towing. Leaving it locked but unattended increases theft risk. 3. How to use replacement key delivery services Replacement key delivery refers to services that cut and program a new car key and deliver it (or have it fitted) to your location—whether your holiday base, airport car park or home driveway. Steps to follow: Have vehicle details ready: make, model, year, registration number, VIN if available. Choose service: For UK and travel users, many auto-locksmiths offer mobile services that come to you. Confirm delivery logistics: Where is the vehicle parked? Will you be present when the key is delivered or fitted? If abroad, is the company able to support your location? Understand key type: Basic mechanical, transponder chip key, keyless fob—all vary in price and logistics. Check old key de-activation: A top provider will delete the lost key’s code so it cannot be used in future—critical for security. Why this is often your best path while travelling Going via your vehicle manufacturer dealer is often slower and pricier — as UK guide notes: “The quickest and least expensive way … is via an auto locksmith.” In a foreign locale, a mobile specialist or key-delivery service saves towing the vehicle and waiting for factory part shipment. 4. Hiring an emergency locksmith: what to look for When you’re locked out or stranded, an emergency locksmith (24-hour) can be your lifeline. But not all are equal. Checklist: Confirm they specialise in auto locksmith / car key replacement , not just domestic locks. Ask for credentials (affiliation with industry body). Insist on proof they will delete/pair the key to your vehicle (so lost key becomes useless). Understand travel/overseas call-out charges. Before arrival, ask for an estimate and payment process (card, cash etc.). Some holiday locales only accept cash. Stay with your vehicle in a safe public place. If you are on a remote vacation site, move to well-lit area before the locksmith arrives. Typical process: The locksmith arrives, verifies ownership (ID + logbook/V5C). They cut and/or program a key, or fix the lock/immobiliser if required. You pay for service and receive the new key — vehicle is back on the road. 5. Insurance, roadside cover and overseas travel issues Insurance/key cover Do you have lost key cover? Most UK car insurance policies don’t include lost keys as standard. You might need a premium add-on. If you claim, your no-claims bonus may be affected. Breakdown/roadside assistance Your breakdown provider (e.g., Motorway or RAC ) may offer key services, but often their vans don’t carry full key-programming equipment. So an auto locksmith still may be needed. Travelling abroad Check if your insurance/cover extends to the country you’re in. Confirm language support and local currency charges with any service you call. If you rented the car: contact the rental company immediately — they may have specific protocols for lost keys (often expensive). 6. Special cases: rental vehicles, keyless entry & fobs Rental vehicles When you lose the keys to a hire car abroad, you are likely to be liable for high fees. Rental companies will likely charge for towing and replacement, not just the locksmith. According to travel forums: “We do not offer coverage for lost keys… The replacement fee of $125 for lost key.” Call the rental agency, follow their instructions, and keep all receipts. Keyless / smart keys & modern cars Most vehicles since 2000 use transponder chips or keyless systems. Replacement these can cost several hundred pounds—UK guides show typical range from £100–£300 or more depending on brand. When you lose a keyless fob, you may need the original still in possession or need the vehicle brought to the dealer. Factor this potential delay into your travel plans. Single key left If you only have one remaining key, treat it as your last key. Get a spare made ASAP once you’re home so you’re not in the same situation again. 7. Preventative measures for your next trip Always carry a spare key at home or with a trusted person. Use a tracker (such as an AirTag or Bluetooth key-tracker) on your keyring. UK blogs suggest this simple tech helps locate lost keys. Establish a routine spot where you place your keys at the start of every journey. If you have old keys (house + car), don’t mix them during travel. Note down your vehicle details (make, model, registration, VIN) in your phone before travelling—so you’re ready if you need a replacement. For holiday car hire, take a photo of the key and keep the rental company’s emergency phone number saved. FAQ Q: What happens if I lose my only car key and I’m abroad? A: You’ll need to contact an auto locksmith or dealer who can cut and program a new key. Have vehicle details ready. Expect cost and waiting time to increase since you have no spare. Q: Can I just use a dealer to replace the key? A: Yes, but often it’s slower and more expensive . UK guides claim mobile auto locksmiths are typically faster and cheaper. Q: How long does replacement take? A: For many modern cars, the physical key can be cut quickly, but programming and blank arrival may take days. Dealers might take up to weeks. Q: Will my car insurance cover a lost key? A: Only if you have key-cover added or your insurance includes it—not standard. Check your policy. Claiming may affect your no-claims status. Q: What should I do if I lose the key and my car is locked in a remote place? A: First make sure you are safe. Then use your breakdown/roadside cover to move the vehicle to a safe area if needed. Then call an emergency auto locksmith to attend and provide a replacement. Need a reliable solution now? Visit our shop at mr-key.com to discover how we can cut and deliver replacement car keys swiftly—even when you’re travelling.

How to Install a Hydrogel Navigation Screen Protector

How to Install a Hydrogel Navigation Screen Protector

Nowadays car interiors rely heavily on touchscreens. Whether you drive a BMW 3 Series , VW Golf , Audi A4 , Mercedes A-Class , Peugeot 3008 , or Skoda Octavia , your infotainment display is the centre of navigation, settings, entertainment and safety features. But these screens are also fragile—prone to scratches , fingerprints , micro-abrasions , and glare . A hydrogel navigation screen protector is one of the best ways to protect your car touchscreen without affecting clarity or touch sensitivity. This guide shows you exactly how to install a hydrogel protector , step by step, with expert tips, mistakes to avoid, and a few insider tricks that most guides miss. What Is a Hydrogel Screen Protector? Hydrogel is a soft, self-healing, flexible material used widely in phone protection and now increasingly in automotive displays. Unlike tempered glass, it adapts to curved edges and eliminates small bubbles over time. For more technical background, you can read the scientific definition on hydrogels Hydrogel is ideal for infotainment screen protection because it: Reduces glare Absorbs micro-scratches Maintains full touch sensitivity Adapts to curved and angled car screens Self-heals small marks over 24–48 hours It’s especially useful for European cars where screens are large and glossy, such as: Mercedes MBUX screens (A-Class, C-Class, GLC) Volkswagen MIB systems (Golf, Passat, Tiguan) BMW iDrive displays (3 Series, X1, X3) Audi MMI touchscreens (A4, A3, Q5) Peugeot i-Cockpit models Renault Clio, Captur, Megane Skoda Octavia, Superb, Scala Curious which specific models benefit the most from hydrogel protection? Check out our full guide on which cars benefit most from hydrogel navigation protection . Before You Start: Essential Preparation Installing a hydrogel protector takes only a few minutes, but the preparation stage determines whether the final result looks factory-perfect . You Will Need Hydrogel screen protector Microfiber cloth Screen-cleaning wipe (wet & dry) Dust-removal sticker (optional but recommended) Small squeegee / card Choose the Right Environment Install the protector in: A dust-free space (car parked indoors is ideal) Soft lighting (so dust particles are visible) A still environment (no wind, no blowing air) Avoid doing it outside or while standing near open windows. Step-by-Step: How to Install a Hydrogel Navigation Screen Protector 1. Clean the Navigation Screen Thoroughly Use a wet wipe first, then a dry microfiber cloth. Focus on: Corners Edges Around the frame Any oily fingerprints Tip: Turn the screen off to see dust more easily. 2. Remove All Dust Particles Even one small dust speck can create a permanent bubble. Use: Dust-removal stickers A clean microfiber cloth Hold the screen at an angle and look under the light. If perfectionism matters anywhere, it’s here. 3. Peel the First Protective Layer Most hydrogel protectors have two layers . Peel Layer 1 halfway and align the protector with: Left and right edges Upper frame Any curved edges Do not peel it completely yet. 4. Align and Apply the Protector Once aligned: Press the top centre gently Slowly drag your finger downward Peel off the rest of Layer 1 as you go The film will naturally stick without much force. 5. Use the Squeegee to Push Out Air Work from centre outward , using firm but controlled pressure. Hydrogel is self-healing , so small micro-bubbles usually disappear within 24–48 hours . 6. Remove the Final Top Layer After application: Peel Layer 2 from one corner Pull slowly to avoid lifting the protector This reveals a glossy, clear surface below. 7. Allow 24 Hours for Full Adhesion Do not touch the screen too much during this period. Avoid: Heat exposure Cleaning sprays Aggressive pressing Hydrogel needs time to “settle” and self-heal. Common Mistakes to Avoid Even a perfect protector can be ruined by simple errors. Installing in a dusty environment Fibres, dust and hair easily get trapped. Touching the sticky side This leaves permanent marks. Rushing the alignment Hydrogel is flexible but not stretch-proof. Cleaning with alcohol after installation This can damage the outer coating. Installing on a hot screen Heat weakens adhesion and causes micro-bubbles. For a complete walkthrough , see our guide on how to protect your car’s navigation screen . Why Hydrogel Is Better Than Tempered Glass for Car Screens Tempered glass works well for smartphones—but not for car navigation screens. Hydrogel performs better because: It bends and adapts to curved displays It doesn’t create raised edges It avoids touchscreen sensitivity issues It self-heals micro-abrasions It provides better Anti-Glare performance If you want to see more in depth guide on why hydrogel protectors are better check out our guide on Hydrogel vs Tempered Glass Navigation Protectors Comparison FAQs 1. Does a hydrogel protector reduce screen sensitivity No. Hydrogel maintains full touch responsiveness because the material is soft and pressure-adaptive. 2. Can I reuse a hydrogel screen protector? No. Once removed, it cannot be reinstalled cleanly. 3. How long do micro-bubbles take to disappear? Usually 24–48 hours. Stubborn ones may take up to 72 hours if the screen is curved. 4. Will the protector affect brightness or clarity? High-quality hydrogel preserves original screen clarity. Matte versions reduce glare but may slightly soften reflections. 5. Is hydrogel safe for anti-reflective or coated screens? Yes. Hydrogel adhesive is gentle and does not damage coatings. If you want premium hydrogel protectors for BMW, Audi, Mercedes, VW, Peugeot, Renault, Skoda and more, explore our full selection today. Visit our shop at mr-key.com Related Guides Which cars benefit most from hydrogel navigation protection How to Protect Your Car’s Navigation Screen from Scratches,Glare & Fingerprints Hydrogel vs Tempered Glass Navigation Protectors Comparison

Programming Your Car’s Keyless Remote: A Simple Guide for Every Car Owner

Programming Your Car’s Keyless Remote: A Simple Guide for Every Car Owner

When it comes to convenience, car keyless remotes have revolutionized the way we interact with our vehicles. No more fumbling with traditional keys or worrying about locking yourself out. With just a push of a button, you can lock, unlock, and even start your vehicle. But what happens when your keyless remote stops working, or when you need to program a new one? Here’s a simple guide to help you program your car's keyless remote, regardless of your vehicle's make or model. Understanding Keyless Remotes Before jumping into the programming process, it’s important to understand what a keyless remote is and how it works. Essentially, a keyless remote allows you to interact with your vehicle without needing to physically insert a key. Instead of using a traditional metal key, your car’s electronic system communicates wirelessly with the remote, allowing you to lock, unlock, and sometimes even start your vehicle, all with the push of a button. These remotes typically use a radio frequency to communicate with your car, sending a signal that’s encrypted for security. Most modern cars use transponder technology, which makes the system more secure and resistant to hacking or copying. This means that the remote must be properly programmed to your vehicle’s system to function correctly. When Do You Need to Program a Keyless Remote? There are several situations in which you might need to program your keyless remote: Replacing a Lost or Damaged Remote : If you’ve lost your keyless remote or it’s no longer functioning properly, you’ll need to get a replacement. This may require programming the new remote to sync with your vehicle. Adding a New Remote : If you’ve bought an additional keyless remote for your car (for a spouse, child, or other family member), you’ll need to program it so that it works with your vehicle. Battery Replacement : Sometimes, replacing the battery in your remote can cause the programming to reset, meaning you’ll need to reprogram the remote for it to work again. Changing or Resetting Vehicle Settings : Occasionally, vehicle settings or remotes can be reset or reprogrammed as part of regular maintenance, requiring you to program new or additional remotes. How to Program Your Car’s Keyless Remote Programming a keyless remote is easier than you might think, and in most cases, it can be done by following a few simple steps. The process varies slightly depending on the make and model of your car, but here’s a general overview of the steps involved: Get Your New or Replacement Remote : Ensure that your remote is compatible with your car’s system. If you're not sure, you can check with your car's manufacturer or an authorized dealership. Some remotes require specific codes to be programmed. Sit Inside Your Vehicle : For safety and security reasons, most cars require you to be inside the vehicle while programming the remote. Insert the Key in the Ignition : Insert the key into the ignition and turn it to the "ON" position without starting the engine. For cars with push-to-start systems, you may need to press the start button without pressing the brake pedal. Activate the Programming Mode : Depending on your car’s system, you’ll need to follow a sequence of steps to enter programming mode. This could involve turning the key on and off several times, or pressing certain buttons in a specific order. Refer to your vehicle’s manual for the exact steps, as the process can differ from one model to another. Program the Remote : Once your car is in programming mode, you’ll need to press the button on your keyless remote that you want to program. Usually, you’ll hear a chime or see the lights flash, indicating that the remote has been successfully programmed. Some cars may require you to press the button several times to ensure proper synchronization. Test the Remote : After programming, test the remote to make sure it works properly. Try locking and unlocking the doors or starting the engine. If everything works as expected, you’re done! Exit Programming Mode : To finish the process, simply turn off the ignition and remove the key. This should exit programming mode. If you have additional remotes to program, repeat the steps above for each one. What to Do if Programming Doesn’t Work While programming a keyless remote is usually a straightforward process, there are instances where things don’t go as planned. If your remote isn’t syncing with your car after following the steps, here are a few troubleshooting tips: Check the Battery : If the remote’s battery is dead or weak, it won’t transmit the signal to your car. Replace the battery and try programming again. Verify the Compatibility : Make sure that the remote is compatible with your vehicle’s make, model, and year. Some vehicles require special remotes that can only be programmed by the manufacturer or an authorized locksmith. Reset Your Vehicle’s System : In some cases, you might need to reset the car’s system to clear previous programming attempts. Check your owner’s manual or consult a professional for assistance. Consult a Professional : If you continue to have issues, it might be time to visit a dealership or a certified locksmith. These professionals have the tools and experience to program the remote correctly and ensure everything works seamlessly. Why Programming Your Keyless Remote Is Important Programming your keyless remote is a simple but important task that helps ensure your car’s security and convenience. By understanding how the process works and what to do if things go wrong, you’ll be able to troubleshoot and solve any issues quickly. Whether you’re replacing a lost remote or adding a new one to your collection, knowing how to program your remote saves time and money compared to visiting a dealership or locksmith. With the increased reliance on keyless remotes for unlocking and starting vehicles, it’s essential for every car owner to be familiar with this process. By keeping your remote in good working condition and knowing how to program it when necessary, you’ll enjoy a smoother, more efficient experience with your vehicle.

The Journey of Car Keys: From Metal to Modern Tech

The Journey of Car Keys: From Metal to Modern Tech

Car keys have come a long way from simple metal tools to advanced digital systems. This evolution reflects the advancements in automotive security, convenience, and technology. Understanding the history of car keys gives you a better appreciation of the tools you use to unlock, start, and secure your vehicle. Here’s a look at how car keys have transformed over the years. 1. The Humble Beginnings: Metal Keys The story of car keys began with simple, unassuming metal keys designed to manually lock and unlock car doors. How They Worked: These keys were physical tools that matched a mechanical lock’s configuration. Challenges: Lost keys or broken locks often required professional locksmiths for replacements or repairs. Impact: Metal keys, while functional, offered little in terms of advanced security or convenience. Though basic, these keys laid the groundwork for innovations to come. 2. Entering the Electronic Era: Remote Keys The next big leap in car key evolution came with the introduction of remote keys in the 1980s. These keys added a layer of convenience and functionality. Features: Remote locking and unlocking. Panic buttons for emergencies. Integration with car alarms for added security. Advantages: No more fumbling for locks in the dark; a simple press of a button provided instant access. Drawbacks: Batteries needed frequent replacement, and repairs were more complex than with traditional metal keys. Remote keys quickly became a standard feature for modern vehicles. 3. The Smart Key Revolution By the late 1990s and early 2000s, smart keys emerged, transforming how you interacted with your car. How They Worked: These key fobs used radio signals to communicate with your car, allowing for keyless entry and push-button starts. Benefits: Enhanced security with encrypted signals. Increased convenience with no need to insert a key into the ignition. Sophisticated design and compact form factors. Limitations: These keys are expensive to replace and require professional programming. Smart keys brought unparalleled convenience but also increased the need for specialized services in case of loss or damage. 4. Integration with Smartphones: Digital Keys In recent years, car key technology has embraced the smartphone revolution, allowing you to unlock and start your car using your mobile device. Features: App-based controls for locking, unlocking, and starting your car. Sharing access with family or friends via the app. Enhanced security with biometric verification like fingerprints or face recognition. Advantages: No physical key needed, making it harder to lose or forget. Considerations: Dependence on phone battery life and app reliability. Digital keys represent the cutting edge of car key technology, blending convenience with advanced security features. 5. Biometric Car Keys: The Future of Security Biometric keys are poised to redefine vehicle access with unmatched security and personalization. How They Work: These systems rely on fingerprint or facial recognition to verify the user’s identity. Benefits: Impossible to replicate or hack. Fully personalized access. Enhanced theft protection. Challenges: High development costs and limited availability in mainstream vehicles. Biometric keys are still in their infancy but hint at a future where cars are more secure than ever. 6. Why Understanding Key Evolution Matters Knowing how car keys have evolved helps you make informed decisions when it’s time to replace or upgrade. Cost Considerations: From simple metal keys to advanced digital systems, replacement costs vary significantly. Security Features: Understanding the security features of your key can help you prevent theft and unauthorized access. Convenience: Opt for a system that matches your lifestyle, whether it’s a traditional key or an app-based digital solution. The more you know, the better equipped you are to choose the right key for your vehicle. Pro Tips for Key Replacement and Maintenance Backup Keys: Always keep a spare key in a safe location. Battery Checks: Replace key fob batteries regularly to avoid sudden malfunctions. Professional Help: Seek professional assistance for programming smart or digital keys. Protect Your Keys: Use a key cover to prevent wear and tear. Proper maintenance ensures your car key remains functional and reliable for years to come. From the simplicity of metal keys to the sophistication of biometric access, car key technology continues to evolve. Each advancement brings greater security, convenience, and innovation, making life easier for car owners like you. Whether you’re replacing a key or exploring the latest tech, understanding this evolution helps you stay ahead in the world of automotive technology.

Chat with us