Post Name

Misplacing or damaging your car keys can be a major inconvenience, but it doesn't have to be a costly ordeal. As a car owner seeking budget-friendly and efficient solutions, understanding your options is crucial. Here's a comprehensive guide to help you navigate the process of replacing your car keys without breaking the bank.

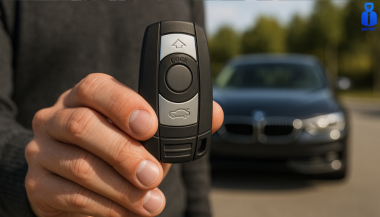
Understanding Your Car Key Type

Identifying the specific type of car key you have is the first step toward an effective replacement:

Traditional Metal Keys: Simple, non-electronic keys that are easy and inexpensive to duplicate.

Transponder Keys: Equipped with a chip that communicates with your vehicle's ignition system for added security.

Remote Key Fobs: Allow remote locking and unlocking of your vehicle, often integrated with a transponder chip.

Smart Keys: Provide keyless entry and start features, utilizing advanced technology for convenience.

Cost-Effective Alternatives to Dealership Key Replacement

Dealerships are known for charging premium prices for key replacements. Consider these more affordable options:

Professional Locksmiths: Specialize in cutting and programming various types of car keys, often at a fraction of dealership costs.

Online Key Retailers: Offer replacement keys and fobs that can be purchased and then programmed either by yourself or a professional.

Hardware Stores: Some stores can duplicate traditional metal keys on the spot, providing a quick and inexpensive solution.

Steps to Take When You've Lost Your Car Key

Losing your car key can be stressful, but following these steps can streamline the replacement process:

Verify Your Vehicle Identification Number (VIN): Locate your VIN, typically found on the dashboard or inside the driver's side door, as it is essential for key replacement.

Gather Necessary Documentation: Prepare proof of ownership, such as your vehicle registration and personal identification.

Contact a Professional: Reach out to a reputable locksmith or key replacement service with your vehicle details to obtain a new key.

Removing a Broken Key from the Ignition or Door Lock

A broken key can be a frustrating obstacle. Here's how to address it:

Use Needle-Nose Pliers: If a portion of the key is protruding, gently extract it using pliers.

Apply Lubricant: Spray a graphite-based lubricant into the lock to ease the removal process.

Seek Professional Assistance: If the key fragment is lodged deep or these methods fail, contact a locksmith to prevent further damage.

Preventative Measures to Avoid Future Key Issues

Keep a Spare Key: Having a duplicate stored safely can save time and money in emergencies.

Regular Maintenance: Inspect your keys and locks periodically for signs of wear and address issues promptly.

Use Key Protectors: Invest in key covers or cases to minimize physical damage.

Related Posts

How to Tell If Your Car Key Needs a Battery or a Full Replacement

How to Tell If Your Car Key Needs a Battery or a Full Replacement

In an age where technology is at the core of almost every part of a vehicle, car keys are no longer simple pieces of metal. They’ve become compact, electronic tools that combine convenience with security — from remote locking systems to transponder chips and push-start capabilities. However, like any piece of technology, car keys are not immune to wear, damage, or electronic failure. And when they stop working, most drivers are left with one essential question: does my key just need a new battery, or is it time for a full replacement? This article dives deep into that very question. Understanding how to recognize the early signs of battery failure versus a complete key malfunction can save drivers from unnecessary frustration and expensive dealership visits. Whether you're dealing with a FIAT flip key, a HYUNDAI remote, or any modern fob, this guide will help you identify the issue and make an informed decision on what to do next. The Anatomy of a Modern Car Key To understand why a key might stop working, it’s helpful to know what’s actually inside it. Most modern car keys—especially those from brands like FIAT, Hyundai, Kia, Peugeot, or Volkswagen—are composed of several key components. At the core is a small lithium coin battery , typically a CR2032 or CR2025, which powers the key's remote functions. There's also a circuit board that contains the remote buttons and signal transmission systems. Some keys include a transponder chip , a tiny RFID device that communicates with your vehicle’s immobilizer system. Then there's the key blade —mechanical or flip-style—and the outer shell , which holds it all together and includes physical buttons. When something goes wrong, the issue can stem from any one of these components. But most commonly, the culprit is either a drained battery or damage to the internal electronics or casing . Early Warning Signs: Is It Just the Battery? Many car key issues start with subtle signs that most drivers overlook. The key may still work occasionally, or it might only respond when standing close to the car. These are common indicators that the battery is on its way out, but hasn’t failed completely yet. One of the first things a driver might notice is that the range of the remote decreases . You may find yourself needing to stand much closer to the vehicle than usual to lock or unlock it. In some cases, the key might require multiple button presses to get a response. If the key has a small LED light (common in many models), you might see it flicker weakly or stop lighting up altogether. These are signs that the battery still has some life, but it's not providing the power needed for consistent performance. The good news? Replacing the battery is often a quick and inexpensive fix, especially if there are no signs of physical damage or moisture exposure. How Long Does a Key Battery Last? The battery inside your key is designed to last between 2 to 3 years under regular use. Factors like frequent use, temperature changes, or prolonged storage can reduce that lifespan. If your key has never had a battery change and it's approaching that age, a weak battery is the most likely cause of any issues. Changing the battery is a simple task in most cases. Many key fobs can be gently pried open using a flathead screwdriver or a plastic tool. Inside, you’ll find the round battery, which can be swapped out for a new one. Always use a high-quality battery from a trusted brand like Panasonic or Maxell to ensure optimal performance. After inserting a fresh battery, the key should immediately start functioning normally again. If it doesn't, then the issue likely runs deeper. When It’s More Than Just the Battery So what happens if you've replaced the battery and the key still doesn't work? This is when it’s time to look at other possibilities. A complete key failure doesn’t just affect the remote functions—it can also affect the chip, the buttons, or even the mechanical components. For instance, if your car uses a push-to-start system and it no longer recognizes your key after a battery replacement, the issue may lie with the transponder chip . This chip is essential for starting the engine, and if it’s been damaged by a drop or water exposure, the car may not respond at all. Keys that have been exposed to moisture , such as rain or accidental washing, are also at high risk. Even small amounts of water can short out the internal electronics or cause corrosion on the contacts, rendering the key useless. Similarly, keys that have been dropped or stepped on can suffer internal damage even if the outer shell looks fine. Another common reason for total failure is button wear . Over time, the rubber buttons on a key can wear down or detach completely, making it difficult to send a signal to the car—even if the electronics are still working underneath. Shell Damage vs. Internal Failure It's important to distinguish between cosmetic damage and a true functional failure. A key with a cracked or broken shell may still work perfectly well, but using it daily becomes inconvenient—or risky, as it can fall apart further over time. In these cases, replacing only the key shell is often the most cost-effective solution. Shell replacement kits are available for most makes and models, including popular FIAT and Hyundai keys. They allow users to transfer the internal electronics and battery into a new casing, restoring the look and feel of the original key without needing reprogramming or electronic parts. However, if the circuit board inside the key is broken , or the transponder chip is no longer recognized by the vehicle , a complete key replacement will be necessary. This often requires purchasing a new key and having it programmed to your vehicle , either through a locksmith or via dealership-level tools. Identifying the Right Replacement Solution The path forward depends entirely on the root cause of the issue. Here’s how to decide: If your key works intermittently and shows no physical damage, start with a battery replacement . If the buttons are worn or the casing is cracked , but the electronics are fine, consider a shell replacement . If the key doesn’t respond at all , even with a new battery, and has no LED or signal , a full replacement is likely needed. If the mechanical blade is damaged , but the remote still functions, you can often just replace the key blade . Replacing just the parts you need can save time and money. Reliable sellers, like mr-key.com , offer a wide range of high-quality key shells, batteries, blades, and even full replacement keys—including options for programming and compatibility details. When your car key stops working, it’s natural to panic. But in most cases, the fix is far simpler than expected. A weak or dead battery accounts for the majority of key-related issues, and replacing it can restore full function within minutes. However, when the damage goes beyond the battery, identifying whether it’s the shell, chip, or internal electronics at fault will determine whether a full replacement is necessary. Being able to recognize the difference between a temporary battery issue and a deeper hardware failure empowers car owners to take quick, cost-effective action. With the right tools and parts—and a little guidance—almost anyone can resolve a car key issue without visiting a dealership. For a full range of replacement parts, including key shells, blades, batteries, and complete remote keys, visit mr-key.com and explore quality products that help restore your car key to like-new condition.

Which Cars Benefit Most From Hydrogel Navigation Protection? (2026 Overview)

Which Cars Benefit Most From Hydrogel Navigation Protection? (2026 Overview)

Modern cars rely heavily on large navigation and infotainment screens. These displays are used constantly and exposed to scratches, fingerprints, dust, heat and direct sunlight. Repairs are expensive, and replacement screens can cost several hundred euros. A hydrogel screen protector adds a thin, flexible layer that guards the display without affecting clarity or touch response. Premium and Luxury Models Premium brands adopted large infotainment screens early, making them among the most likely to benefit. BMW models such as the 3 Series , 5 Series and X5 use wide, high-resolution displays (up to 14.9”). Audi cars like the A4 , A6 and Q5 include 10–12” touchscreens. Mercedes-Benz models such as the C-Class , E-Class and GLC use vertically oriented 11–12” MBUX screens. Porsche vehicles (Cayenne, Macan, Panamera) and Tesla models (Model 3, Y, S) use some of the largest screens in Europe. These vehicles benefit significantly from a hydrogel protector thanks to their large surfaces and frequent touch use. Popular European Models Mainstream European cars now feature screens as large as luxury models. Volkswagen offers 10–15” displays in models such as the Golf , Tiguan and Passat . Škoda uses up to 13” screens in the Octavia , Superb and Kodiaq . Dacia equips models like the Jogger , Duster and Sandero with 7–10” displays. Toyota (Corolla, RAV4, Yaris Cross). Renault (Captur, Clio, Megane E-Tech). Peugeot (208, 3008, 5008) Citroën (C4, C5 Aircross) Nissan (Qashqai, Juke, Leaf) Ford (Focus, Kuga) Kia (Sportage, Ceed, Niro, Picanto, Stonic, Rio, Sorento) all rely on large central touchscreens. As screens grow in size across all price segments, protection becomes increasingly important. Benefits of Hydrogel Screen Protectors Hydrogel film is thin, flexible and adheres tightly. It works on flat and curved surfaces where tempered glass cannot. The material absorbs small impacts and can self-heal minor marks. With its anti-glare properties It keeps the display clear, maintains original brightness and preserves smooth touch performance. It also helps reduce smudges and makes daily cleaning easier. Once you’ve chosen a hydrogel protector for your car, the next step is applying it correctly. Follow our step-by-step guide on how to install a hydrogel navigation screen protector for a perfect bubble-free result. Who Needs Hydrogel Protection the Most? Any car with: a large touchscreen (8” or more) glossy glass prone to fingerprints curved edges high cabin sun exposure Hydrogel is especially useful for daily drivers, family cars and vehicles where multiple people interact with the system. Rental, Company and Service Vehicles Benefit Even More Cars used for business—such as rental cars , company vehicles , fleet cars , taxis , and service vehicles —experience significantly higher daily usage than private cars. Their navigation screens are touched constantly by different drivers, exposed to dust, temperature changes and frequent cleaning. Because of this heavy wear, screens in rental and company vehicles are far more likely to show scratches, fingerprints and long-term damage. A hydrogel dashboard screen protector adds a durable layer that absorbs daily abuse, keeps the display clear for every driver and reduces maintenance costs for fleet managers. For any vehicle that is shared or driven by multiple users, screen protection is not just useful—it’s essential . FAQ What is a hydrogel screen protector? A thin, flexible film that protects a car’s navigation or dashboard display. How is it installed? Clean the screen, align the film and press it down. Dry installation is recommended. What are the benefits? Scratch resistance, impact absorption, reduced fingerprints and full coverage on curved screens. Is it compatible with all cars? Yes, if you choose a protector cut for your specific model. Does it affect touch response? No. Hydrogel keeps full touch accuracy. How long does it last? Usually 1–3 years, depending on use. Easy to replace. Hydrogel vs tempered glass? Hydrogel fits curved screens and absorbs impacts. Glass is harder but can crack and does not cover complex shapes. For more in depth guide check out Hydrogel vs Tempered Glass Navigation Protectors Comparison How can I protect my car’s navigation screen from scratches and fingerprints? If you want to know more about How to Protect Your Car’s Navigation Screen from Scratches and Fingerprints check out our guide. Visit mr-key.com to find a custom-cut hydrogel protector for your car model. Related Guides How to Install a Hydrogel Navigation Screen Protector How to Protect Your Car’s Navigation Screen from Scratches, Glare & Fingerprints Hydrogel vs Tempered Glass Navigation Protectors Comparison

Condensation Inside Motorcycle TFT Displays: Causes, Warning Signs & What It Really Means

Condensation Inside Motorcycle TFT Displays: Causes, Warning Signs & What It Really Means

Every modern motorcycle rider has seen it. You park your bike after a cold morning ride, glance at the dashboard, and notice a faint haze forming behind the TFT screen. Maybe small droplets gather along the edges. Maybe the whole display looks fogged from the inside. That moisture is not cosmetic. It is water inside a sealed electronic unit — and it is the earliest visible warning of a problem that can destroy a component costing €700 to over €1,200 to replace. This guide explains exactly why condensation forms inside motorcycle TFT displays, which bikes are most affected, what it really means for your instrument cluster, and the one affordable upgrade that prevents the damage cycle before it starts. Why Motorcycle TFT Displays Get Condensation Inside A motorcycle TFT display is a sealed electronic module exposed to some of the harshest conditions any screen will ever face. Unlike your phone in a pocket, a motorcycle dashboard sits directly in the path of rain, road spray, temperature swings, UV radiation, and constant vibration. Condensation forms when warm, humid air trapped inside the display housing meets a cooler surface — the glass front panel. The moisture in that air turns to liquid droplets on the coldest point, which is almost always the inside face of the screen. Here is how moisture gets trapped in the first place. Thermal breathing. Every ride creates a heat cycle. The engine, direct sunlight, and the display's own backlight warm the air inside the housing. When the bike stops and cools, that air contracts and draws in fresh, humid outside air through micro-gaps in the seals. Over weeks and months, humidity accumulates inside the unit. Seal degradation. The rubber gaskets and adhesive bonds that seal a TFT housing are not permanent. UV exposure breaks down rubber. Vibration loosens adhesive joints. Temperature cycling causes materials to expand and contract at different rates, gradually opening pathways for water ingress. Micro-damage to the front surface. Stone chips, cleaning scratches, and pressure marks on the display face can create hairline cracks invisible to the naked eye. These become moisture entry points — especially in rain or when using a pressure washer. High-humidity environments. Riders in coastal areas, tropical climates, or northern European countries with persistent dampness face accelerated moisture ingress. A bike garaged in a humid environment without ventilation is particularly vulnerable. The result is always the same: water inside the display that the sealed housing cannot easily release. Which Motorcycles Are Most Affected Condensation inside TFT displays is not limited to one manufacturer. It has been documented across virtually every major brand using TFT instrument clusters. BMW — The R 1250 GS, R 1300 GS, S 1000 RR, F 850 GS, and F 900 R all use 6.5-inch or 10.25-inch TFT displays. These are high-quality units, but they sit in exposed positions — particularly on adventure models ridden in all weather conditions. OEM replacement for the 6.5-inch TFT runs around £1,200, and if the wiring loom is damaged during theft or failure, that figure can reach £3,000+. Yamaha — Models like the MT-09, MT-07, Tracer 9, and Ténéré 700 use TFT dashboards. Yamaha's displays are generally well-sealed, but the same thermal breathing cycle applies. Adventure and touring riders who cover high mileage in variable conditions report condensation after 2–3 seasons. Honda — The Africa Twin, CB650R, and CBR1000RR-R all run TFT clusters. The Africa Twin's display sits in a highly exposed cockpit position. Forum reports from owners confirm moisture ingress, especially after extended wet-weather riding. Triumph — The Tiger 900, Street Triple, and Speed Triple RS use TFT displays. Triumph's units are compact, but the same vulnerability to vibration-induced seal failure applies across the range. Kawasaki — The Z900, Ninja 1000SX, Versys 1000, and newer Z650 models all feature TFT dashboards. Like all manufacturers, Kawasaki's sealed units face the same environmental pressures. The pattern is clear: this is not a brand-specific defect. It is an inherent vulnerability of mounting sensitive display technology in one of the most hostile environments imaginable. The Warning Signs You Should Never Ignore Condensation inside a motorcycle TFT display is progressive. It starts small and escalates. Here is what each stage looks like — and what it means. Light fogging after a cold start. A thin mist on the inside of the screen that clears within 10–15 minutes of riding. This is the earliest sign. Moisture is present inside the housing but has not yet caused damage. At this stage, the problem is still manageable. Persistent edge condensation. Droplets that form along the bottom or side edges of the display and do not fully evaporate during a ride. This means moisture is accumulating faster than it can escape. The seals are compromised. Internal staining or water marks. Visible trails, spots, or discolouration behind the glass that remain even when the display is dry. This is mineral residue from evaporated water. It means moisture has been cycling inside the display repeatedly. The internal coatings and bonding layers are being attacked. Intermittent display issues. Flickering backlight, sections of the screen dimming unevenly, or the display briefly shutting off during a ride. These are early signs of electrical damage from moisture reaching the circuit board or flex connectors behind the panel. Dead pixels appearing alongside condensation. If you see pixel failure combined with any visible moisture, the display is in active degradation. The liquid crystal layer or its driver circuits are being damaged. This combination almost always leads to full failure. Complete display blackout. The screen powers on but shows nothing, or fails to power on at all. At this point, the TFT module is usually beyond repair and must be replaced entirely. The critical takeaway: condensation that clears quickly is a warning. Condensation that stays, stains, or coincides with display glitches means damage is already underway. What Condensation Actually Does to a TFT Display The fog itself is not the problem. The damage happens behind it. A motorcycle TFT display is a laminated stack of layers: a front glass or polycarbonate cover, a polarising film, the liquid crystal panel itself, LED backlighting, and a circuit board with drivers and connectors. All bonded together with adhesive and housed in a sealed plastic or metal frame. When moisture sits inside this assembly, several destructive processes begin simultaneously. Corrosion of electrical contacts. The flex cables and solder joints connecting the LCD panel to the main circuit board are extremely sensitive to moisture. Even trace amounts of water can cause oxidation, increasing resistance and eventually breaking the connection. This is how entire rows or columns of pixels fail at once. Delamination of optical layers. The adhesive bonds between the polariser, LCD panel, and backlight diffuser swell and weaken when exposed to moisture. This causes visible clouding, uneven brightness, and eventually permanent optical distortion. Mineral deposits on internal surfaces. Water that evaporates inside the display leaves behind dissolved minerals and contaminants. These deposits scatter light, reduce contrast, and cannot be cleaned without disassembling the unit — which is rarely possible without destroying it. Short circuits on the PCB. If enough moisture reaches the main circuit board, it can bridge traces and create short circuits. This can cause complete display failure, error codes, or even damage to the motorcycle's CAN bus communication system. A motorcycle TFT display is not designed to be serviced. It is a sealed, disposable module. Once moisture damage reaches the internal electronics, the only option is full replacement. How to Prevent Water Ingress in Motorcycle TFT Displays Before Damage Starts Prevention is not complicated. But it requires acting before symptoms appear — not after. Never use a pressure washer on the dashboard. High-pressure water jets force moisture past seals that can handle rain but not direct, concentrated spray. Wash the display area gently with a damp microfibre cloth and motorcycle-safe LCD cleaner. Avoid parking in direct sunlight for extended periods. Prolonged heat accelerates UV degradation of seals and adhesives. It also increases the temperature differential that drives the thermal breathing cycle. Use a cover or park in shade when possible. Store the bike in a ventilated, dry environment. A damp, unventilated garage is one of the worst places for a motorcycle with a TFT display. If humidity control is not possible, a small dehumidifier or silica gel packs placed near the bike can help. Inspect the display edges regularly. Look for any visible gap between the display housing and its frame, or any separation of the front glass from the body. Catching a seal failure early — before moisture accumulates — gives you the chance to act. Protect the display surface from physical damage. The front face of the TFT is the largest and most vulnerable entry point for moisture. A single stone chip or a scratch from an abrasive cloth can breach the surface coating and create a pathway for water. Preventing that surface damage is the single most effective thing you can do. The One Upgrade That Prevents Condensation Damage in Motorcycle TFT Displays A quality screen protector designed specifically for your motorcycle's TFT display is the most cost-effective protection available — by a wide margin. Here is what a properly fitted screen protector actually does. It creates a physical barrier against impact. Stone chips, gravel flicks, and minor impacts hit the protector instead of the display surface. This eliminates the micro-cracks that become moisture entry points. It shields the surface from UV radiation. UV is the primary cause of seal and adhesive degradation. A screen protector absorbs UV energy before it reaches the display housing, slowing the ageing process of the seals beneath. It prevents cleaning damage. Without a protector, wiping the TFT with a dirty cloth, gloves, or the wrong cleaning product can create fine scratches that compromise the surface. With a protector fitted, you can clean aggressively without risking the display itself. After a few years, replace the protector — the screen underneath stays pristine. It reduces direct water contact with the display edges. A well-fitted protector overlaps the display bezels slightly, redirecting water away from the most vulnerable seal points around the screen perimeter. The cost comparison makes the decision obvious. A screen protector costs between €10 and €25. A TFT display replacement costs €700 to €1,500 or more, depending on the motorcycle. That is a return on investment measured in thousands of percent. Riders who fit a screen protector on day one of ownership — before the first ride, before the first stone chip, before the first rain — give their TFT display the best possible chance of lasting the life of the motorcycle. What to Do If You Already Have Condensation If moisture is already visible inside your display, the situation is not necessarily hopeless — but your options depend on how far it has progressed. If you see light fogging only. Park the bike in a warm, dry, ventilated space. Run the engine and let the display heat up for 20–30 minutes to encourage evaporation. Some riders have had success placing a small silica gel packet near the display housing to draw out residual moisture. Fit a screen protector immediately to prevent further surface-level water entry. If the bike is under warranty. Contact your dealer. Condensation inside a sealed TFT display is a manufacturing defect in the seal or housing. Many manufacturers — including BMW and KTM — have replaced displays under warranty for this exact issue. Document the condensation with clear photographs before your appointment. If condensation has caused staining or pixel issues. At this stage, the damage is internal and typically irreversible without replacing the display module. Get a quote from your dealer, check whether aftermarket options exist for your model, and fit a screen protector to the new unit immediately to prevent the cycle repeating. FAQ Is condensation inside my motorcycle TFT display normal? A very light, temporary fog on a cold morning that clears within minutes can occur even in a properly sealed unit. However, persistent condensation, visible droplets, or any staining is not normal — it indicates a compromised seal and active moisture ingress. Can I fix condensation inside a motorcycle display myself? If it is only light fogging, gentle heat and dry storage may resolve it temporarily. However, the seals are already compromised, so it will likely return. Full repair requires resealing or replacing the display unit, which is not a realistic DIY job for most riders. Will condensation void my warranty? No. Condensation inside a sealed factory unit is a seal failure, not user damage. Most manufacturers honour warranty claims for moisture ingress, provided there is no evidence of physical impact or tampering. Always document the issue with photos. How much does it cost to replace a motorcycle TFT display? OEM replacement costs vary significantly. BMW TFT units typically cost £700–£1,200 for the part alone, plus fitting. Honda, Yamaha, Triumph, and Kawasaki displays range from €400–€900 depending on the model. Labour adds €100–€300. Does a screen protector actually prevent condensation? A screen protector does not fix existing condensation. What it does is prevent the surface damage — stone chips, scratches, UV degradation — that causes seals to fail and moisture to enter in the first place. It is the most effective preventive measure available. Should I fit a screen protector to a brand-new bike? Yes. Day one. Before the first ride. The TFT display is at its most vulnerable when new because the seals have not yet been tested, and any early surface damage will accelerate their failure. Protecting the screen from the start is the best insurance against a four-figure repair bill down the line. Does riding in rain damage a motorcycle TFT display? Rain alone should not damage a properly sealed TFT display. The issue is cumulative: repeated exposure to rain, spray, temperature cycling, and UV gradually degrades seals over time. A screen protector significantly slows this process by shielding the most exposed surface. Protect Your Display Before It Costs You Hundreds A motorcycle TFT display is one of the most expensive single components on a modern bike — and one of the most exposed. The damage from water ingress is progressive, often invisible until it is too late, and almost always irreversible. A screen protector fitted from day one is the simplest, cheapest, and most effective way to protect that investment. Browse precision-fit motorcycle TFT screen protectors for BMW, Yamaha, Honda, Triumph, Kawasaki, and more at mr-key.com.

Hydrogel vs Tempered Glass Navigation Protectors Comparison

Hydrogel vs Tempered Glass Navigation Protectors Comparison

Cars and vehicles nowadays often include large touchscreen navigation systems that are prone to scratches, fingerprints and cracks. These displays are expensive to replace – one owner reported a factory infotainment screen costing over $3,000 to swap out – so protecting them is crucial. That’s where navigation screen protectors come in. The two main options are hydrogel film protectors and tempered glass protectors . Below, we compare hydrogel vs tempered glass for car navigation screens, looking at fit, durability, clarity and more, so you can choose the best protection for your car. Hydrogel vs Tempered Glass: The Essentials Tempered glass protectors A rigid, hard 9H glass shield. Excellent scratch resistance, very clear, and feels like the original screen. Best for completely flat displays. Hydrogel protectors A flexible, self-healing polymer film originally used in aviation and military applications. Ultra-thin, edge-to-edge fit, excellent for curved or uniquely shaped screens. Key difference: Hydrogel bends. Tempered glass doesn’t. Fit & Coverage (Hydrogel Wins) Modern cars often have curved or tapered displays. Tempered glass cannot follow these shapes, leaving exposed edges, air gaps or weak adhesion points. Hydrogel protectors conform perfectly to flat, curved and 3D-shaped screens. They wrap the edges, eliminate halo gaps, and achieve full-surface coverage. If your car’s screen isn’t perfectly flat, hydrogel is the correct choice. Scratch & Impact Protection Tempered glass: Extremely resistant to scratches Can crack on impact, sacrificing itself to protect the screen Once cracked, must be replaced Hydrogel: Softer surface, but self-heals micro-scratches over time Doesn’t shatter; absorbs everyday bumps Ideal for preventing long-term wear and swirl marks Glass is harder; hydrogel stays clearer longer thanks to self-healing. Clarity, Glare & Touch Sensitivity Both types maintain high clarity and touch accuracy, but behave differently in real use: Tempered glass: Ultra-clear Glossy surface shows fingerprints easily Good touch response Hydrogel: Crystal-clear or matte anti-glare options Reduces reflections in sunlight — very useful in cars Zero touch interference due to ultra-thin structure Minor micro-bubbles self-resolve within hours If you drive in bright sun or hate fingerprint shine, hydrogel’s matte option is a major advantage. Installation & Removal Tempered glass: Simple dry install One-shot alignment Rigid, so easy to place but unforgiving if misaligned Hydrogel: Dry or wet install Allows micro-adjustments Easy bubble removal No cracking during installation Removal is simple for both, though hydrogel is safer (no glass shards, no risk of breakage during removal). If you want to learn more about how to install your hydrogel navigation screen protector visit our guide. Which Should You Choose? For general car owners with modern infotainment systems, the winner is clear: ✔ Hydrogel protectors are better for most car navigation screens. Why: Perfect fit on curved screens Self-healing surface Anti-glare options Full edge-to-edge coverage Zero loss in touch sensitivity Tempered glass is fine for older or perfectly flat screens — but today’s automotive displays benefit more from hydrogel technology. FAQ Does a navigation screen really need protection? Yes. Screens scratch easily, attract fingerprints, and are expensive to replace. A protector preserves clarity and resale value. Is hydrogel or tempered glass better overall? Hydrogel — unless your screen is perfectly flat. It fits better, reduces glare, and self-heals surface scratches. Will a protector affect touch response? No. Both types maintain excellent touch accuracy. Hydrogel is especially responsive due to its thin, adaptive structure. How do I protect my screen from fingerprints and glare? Use a matte hydrogel film. For more techniques, see our guide on [ How to Protect Your Car’s Navigation Screen from Scratches, Glare & Fingerprints ] . Which cars benefit most from hydrogel protection? Any model with curved, large, glossy or high-resolution displays. See our model list: [ Which Cars Benefit Most From Hydrogel Navigation Protection? ] . For custom-cut hydrogel protectors for your exact car model, visit mr-key.com . Related Guides How to Protect Your Car’s Navigation Screen from Scratches, Glare & Fingerprints How to Install a Hydrogel Navigation Screen Protector Which Cars Benefit Most From Hydrogel Navigation Protection?

Chat with us