Post Name

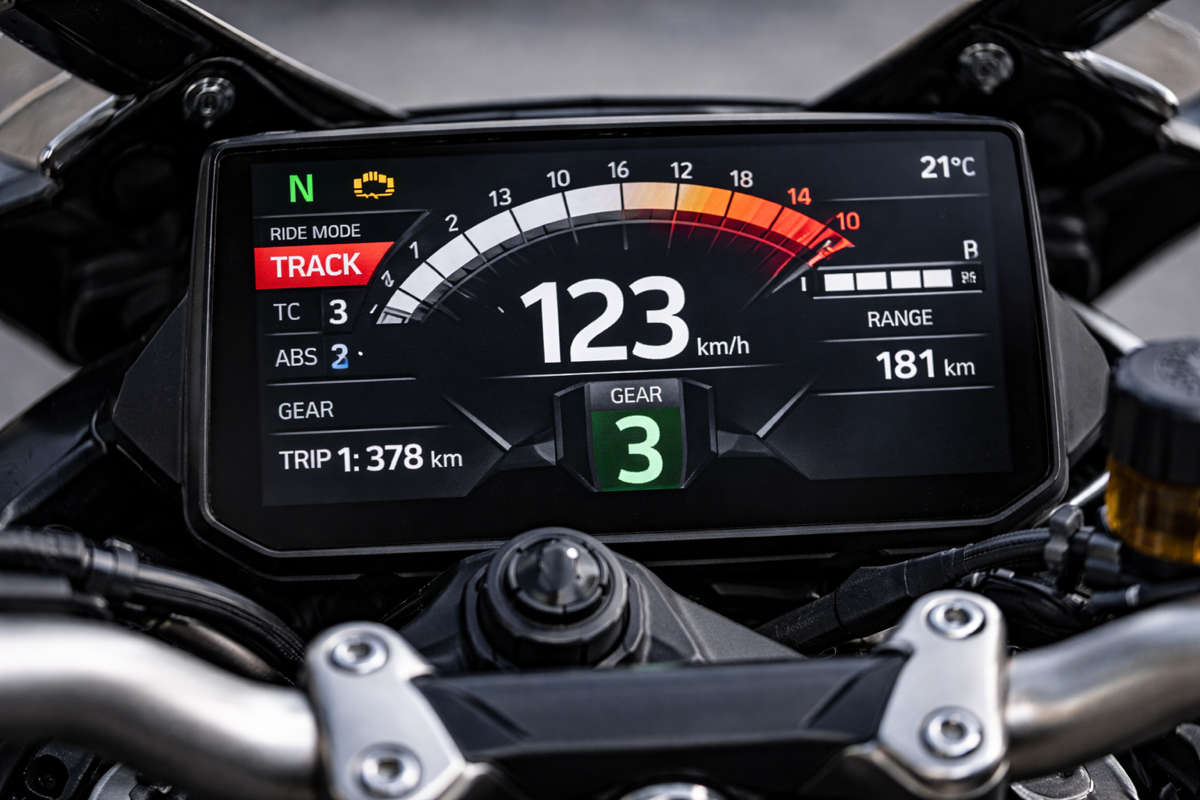
Dead pixels on a motorcycle TFT display are rarely “just cosmetic”.
On modern bikes, the TFT dashboard is a sealed, laminated electronic unit exposed to sun, heat, vibration, rain, and pressure washing. When pixels fail, it often signals structural damage inside the display, not a surface defect.
This article explains what TFT display dead pixels really mean, why they appear, how to diagnose them correctly, and the point where replacement becomes unavoidable.

What riders mean by “dead pixels” — and why it matters
The term motorcycle display dead pixels is used loosely. In practice, three very different faults exist.

True dead pixels (permanently black)
A true dead pixel is a pixel transistor that no longer functions. It stays black on all backgrounds and during startup screens.

This is a hardware failure inside the LCD matrix. It does not self-heal.

Stuck pixels (fixed bright color)
A stuck pixel remains red, green, blue, or white. On phones or TVs, this can sometimes be intermittent.

On motorcycle TFTs, stuck pixels are often caused by heat stress or internal pressure and frequently progress into permanent failure.

Lines or blocks of dead pixels
A vertical or horizontal line of missing pixels is not a pixel issue.
It indicates row or column driver failure inside the panel — a structural defect of the display module. Once this appears, replacement is usually inevitable.

Why TFT dead pixels appear on motorcycles
Dead pixels on a dashboard are rarely random. They follow consistent mechanical and environmental causes.

Heat and UV exposure
Motorcycle TFTs sit in direct sunlight. Daily heat cycles expand and contract the laminated layers inside the display.
Over time, this stresses internal bonds and pixel drivers. A single failed pixel can become a cluster.

Micro-impact and pressure
A light impact that doesn’t crack the glass can still damage the internal LCD stack.
This is common on naked bikes and adventure models where the display is more exposed.

Moisture ingress and condensation
Condensation inside a TFT display is a critical warning sign.
It means the factory seal has been compromised. Moisture accelerates corrosion on connectors and display drivers, often leading to dead pixels followed by total blackout.

Electrical stress
Voltage fluctuations or grounding issues can contribute, but if the pixel defect appears in the same physical location across reboots, the issue is almost always panel-level, not wiring.


Brand examples: how this appears in real motorcycles
Dead pixel reports follow similar patterns across brands.

BMW TFT clusters: pixel lines or dark zones often appear after heat exposure or condensation events. Clusters are fully integrated and typically replaced as a unit.

Yamaha TFT dashboards: isolated dead pixels may appear first, followed by spreading rows on models parked outdoors long-term.

Kawasaki TFT displays: line failures are commonly reported after pressure washing or heavy rain use.

Honda TFT dashboards: less frequent, but once pixel clusters appear, dealers usually recommend full replacement.

Across all brands, panel repair is not part of standard dealer service.

Fast diagnosis: how to tell if the damage is permanent
You can determine the seriousness in minutes.

Check startup screens
If the pixel defect appears during the boot logo or splash screen, it is hardware, not software.

Test multiple backgrounds
Switch themes or display modes:
Always black → dead pixel
Always bright or colored → stuck pixel
Straight line → driver failure

Look for progression
A defect that grows over weeks is not stable. Progression is a replacement signal.

Inspect for condensation
Any fogging or haze inside the screen means moisture ingress. Pixel failure combined with condensation almost always worsens.

When TFT display replacement is inevitable
Replacement is not about annoyance. It’s about predictable failure.
Replacement becomes inevitable when any of the following occur:
A row or column of dead pixels appears
Dead pixels spread over time
Dead pixels appear together with condensation
The defect blocks speed, warnings, or riding data
The bike relies on the TFT for ride modes or system alerts

At this stage, the TFT is no longer a reliable instrument cluster.

Why TFT displays are rarely repaired
A motorcycle TFT is not a standalone screen.
It is:
Laminated glass + LCD + polarizer
Sealed against weather
Electronically paired to the motorcycle

Separating and rebuilding this stack requires specialized industrial equipment. As a result, OEMs replace the entire unit.
Used clusters introduce risks: coding issues, immobilizer pairing, mileage discrepancies, and unknown moisture history.

Cost reality in Europe
In Europe, OEM motorcycle TFT replacement typically ranges from:
€600–€1,200 for mid-range models
€1,500–€2,500+ for premium or integrated systems

This includes coding and calibration, not just the display itself.
That’s why a small dashboard pixel issue deserves early attention.

Can dead pixels be prevented?
You cannot prevent internal electronic aging.
You can reduce the most common triggers:
Surface scratches that weaken seals
Micro-impacts
UV exposure
Moisture pooling around edges

A properly fitted screen protector does not fix dead pixels, but it reduces the external damage pathways that often lead to full TFT failure.

If you want to reduce the risk of turning a small pixel defect into a four-figure repair, you can protect the display surface early — explore motorcycle TFT screen protectors at mr-key.com

FAQ: TFT display dead pixels

Are dead pixels dangerous?
They are not dangerous by themselves, but they often indicate deeper display degradation.

Can software updates fix dead pixels?
No. If the defect appears in the same physical location during startup, it is hardware.

Will one dead pixel spread?
Sometimes. Spread is common when heat or moisture is involved.

Is condensation inside the TFT serious?
Yes. Condensation indicates seal failure and greatly increases the risk of progressive damage.

Is replacement always required?
Not for a single stable pixel. Replacement becomes unavoidable with progression, lines, or moisture involvement.

Related Posts

How to Clean and Maintain Your Car Key Fob Like a Pro

How to Clean and Maintain Your Car Key Fob Like a Pro

Your car key fob is one of the most used items in your daily life. You press it multiple times a day, carry it in your pocket or bag, toss it on desks, and sometimes accidentally drop it on the ground. But how often do you actually clean or check it? Most people only think about their key fob when it stops working. By then, it's often too late. The good news is, with a little attention and regular maintenance, you can keep your car key fob working perfectly for years to come. In this article, you'll learn how to clean and maintain your car key fob like a pro — so you can save money, avoid frustration, and get the best performance out of your key. Why Cleaning and Maintaining Your Key Fob Matters Car key fobs aren’t just simple remotes. They're packed with sensitive electronics, small batteries, and tiny contact points that can easily get damaged by dirt, moisture, or simple neglect. If you never clean or check your key fob, you might start to notice: Unresponsive buttons Reduced signal range Frequent battery issues Complete failure to unlock or start the car Most of these problems are avoidable with basic maintenance . Cleaning your key fob regularly helps keep it functional, protects its electronics, and ensures it lasts longer. It also saves you from spending money on costly repairs or total key replacements. How to Clean Your Car Key Fob: Step-by-Step Guide Step 1: Open the Key Fob Gently Start by carefully opening your key fob. Most models have a small groove or notch where you can insert a flathead screwdriver or a coin to separate the shell. Be gentle — forcing it open can crack the plastic or damage internal clips. If you're unsure, check your car’s manual or look up your key model online to find specific instructions. Step 2: Remove the Battery Once you open the key fob, always remove the battery before cleaning. This protects the electronic circuit from any accidental moisture and prevents short-circuiting. Set the battery aside in a dry, safe place. Step 3: Clean the Exterior Use a soft, dry microfiber cloth to wipe the outside of the key fob shell. For tougher dirt or sticky areas, slightly dampen the cloth with water or isopropyl alcohol (70% or higher). Avoid using harsh cleaning chemicals that could damage the plastic or remove painted symbols. Step 4: Clean the Buttons and Small Gaps Dirt, dust, and pocket debris often collect around the buttons. These particles can block the buttons from making proper contact or cause them to stick. Use a cotton swab or a soft toothbrush to gently clean around the edges and in between the buttons. For tight spaces, a toothpick can help dislodge stubborn dirt. If needed, lightly moisten the cotton swab with alcohol to break down grime. Always dry the key fob thoroughly after cleaning. Step 5: Inspect and Clean the Battery Contacts Battery contacts can become dirty or corroded over time, especially if the battery leaked or moisture got inside. Check the metal contact points carefully. If you see white powder or greenish residue (common signs of corrosion), gently clean them using a cotton swab dipped in isopropyl alcohol. Be extremely careful not to bend or scratch the contacts. If corrosion is too severe, the key fob might need professional repair or a replacement circuit board. Step 6: Replace the Battery if Needed Key fob batteries typically last between 1 to 2 years, but frequent use, weak signals, or exposure to extreme temperatures can shorten battery life. If your battery is old or low, replace it with a new one. Most car key fobs use CR2032 or CR2025 batteries. Always make sure you install the new battery in the correct position, respecting the polarity (+ / -). A fresh battery not only improves response time but also ensures the signal reaches your car reliably. Step 7: Reassemble the Key Fob Once everything is clean and fully dry, carefully snap the key fob back together. Make sure the casing is securely closed and the buttons feel smooth and responsive. Test the key fob to confirm that it works correctly. Pro Tips to Keep Your Car Key Fob in Top Shape A well-maintained key fob can last many years. Here’s how to keep it working perfectly: Keep it Dry: Most key fobs aren’t waterproof. Avoid rain, puddles, wet pockets, or any contact with liquids. Use a Protective Cover: A silicone or rubber key cover adds shock protection, keeps out dirt, and prevents scratches. Avoid Extreme Heat or Cold: Leaving your key fob in direct sunlight or in a freezing car can damage the battery and weaken plastic parts. Change the Battery Regularly: Don’t wait for your key fob to completely stop working. Weak batteries can lead to unreliable signals and unexpected failure. Don’t Drop It: Even though most key fobs can handle light drops, repeated impact can cause internal damage. When to Replace the Key Fob Shell If your key fob shell is cracked, worn, or no longer closes tightly, it’s time to replace it. A damaged shell can let moisture and dirt reach the electronics and cause long-term damage. Replacing the shell is a quick and affordable solution that can extend your key fob’s life significantly. At Mr. Key , we offer high-quality key fob shells, batteries, and repair kits that can help you refresh your key fob and save money compared to dealership prices. Explore our key fob repair kits, protective covers, and replacement batteries now at mr-key.com . Your car key fob may seem like a small detail, but it plays a huge role in your daily life. Without it, you can’t get in or even start your car. The good news is that taking care of your key fob is easy. With regular cleaning, battery checks, and some simple maintenance, you can keep it working reliably for years. And if you need to replace your battery, your key shell, or your entire key fob, Mr. Key is here to help. We provide everything you need to keep your keys in perfect shape, save money, and avoid unnecessary trips to the dealer.

Programming Your Car’s Keyless Remote: A Simple Guide for Every Car Owner

Programming Your Car’s Keyless Remote: A Simple Guide for Every Car Owner

When it comes to convenience, car keyless remotes have revolutionized the way we interact with our vehicles. No more fumbling with traditional keys or worrying about locking yourself out. With just a push of a button, you can lock, unlock, and even start your vehicle. But what happens when your keyless remote stops working, or when you need to program a new one? Here’s a simple guide to help you program your car's keyless remote, regardless of your vehicle's make or model. Understanding Keyless Remotes Before jumping into the programming process, it’s important to understand what a keyless remote is and how it works. Essentially, a keyless remote allows you to interact with your vehicle without needing to physically insert a key. Instead of using a traditional metal key, your car’s electronic system communicates wirelessly with the remote, allowing you to lock, unlock, and sometimes even start your vehicle, all with the push of a button. These remotes typically use a radio frequency to communicate with your car, sending a signal that’s encrypted for security. Most modern cars use transponder technology, which makes the system more secure and resistant to hacking or copying. This means that the remote must be properly programmed to your vehicle’s system to function correctly. When Do You Need to Program a Keyless Remote? There are several situations in which you might need to program your keyless remote: Replacing a Lost or Damaged Remote : If you’ve lost your keyless remote or it’s no longer functioning properly, you’ll need to get a replacement. This may require programming the new remote to sync with your vehicle. Adding a New Remote : If you’ve bought an additional keyless remote for your car (for a spouse, child, or other family member), you’ll need to program it so that it works with your vehicle. Battery Replacement : Sometimes, replacing the battery in your remote can cause the programming to reset, meaning you’ll need to reprogram the remote for it to work again. Changing or Resetting Vehicle Settings : Occasionally, vehicle settings or remotes can be reset or reprogrammed as part of regular maintenance, requiring you to program new or additional remotes. How to Program Your Car’s Keyless Remote Programming a keyless remote is easier than you might think, and in most cases, it can be done by following a few simple steps. The process varies slightly depending on the make and model of your car, but here’s a general overview of the steps involved: Get Your New or Replacement Remote : Ensure that your remote is compatible with your car’s system. If you're not sure, you can check with your car's manufacturer or an authorized dealership. Some remotes require specific codes to be programmed. Sit Inside Your Vehicle : For safety and security reasons, most cars require you to be inside the vehicle while programming the remote. Insert the Key in the Ignition : Insert the key into the ignition and turn it to the "ON" position without starting the engine. For cars with push-to-start systems, you may need to press the start button without pressing the brake pedal. Activate the Programming Mode : Depending on your car’s system, you’ll need to follow a sequence of steps to enter programming mode. This could involve turning the key on and off several times, or pressing certain buttons in a specific order. Refer to your vehicle’s manual for the exact steps, as the process can differ from one model to another. Program the Remote : Once your car is in programming mode, you’ll need to press the button on your keyless remote that you want to program. Usually, you’ll hear a chime or see the lights flash, indicating that the remote has been successfully programmed. Some cars may require you to press the button several times to ensure proper synchronization. Test the Remote : After programming, test the remote to make sure it works properly. Try locking and unlocking the doors or starting the engine. If everything works as expected, you’re done! Exit Programming Mode : To finish the process, simply turn off the ignition and remove the key. This should exit programming mode. If you have additional remotes to program, repeat the steps above for each one. What to Do if Programming Doesn’t Work While programming a keyless remote is usually a straightforward process, there are instances where things don’t go as planned. If your remote isn’t syncing with your car after following the steps, here are a few troubleshooting tips: Check the Battery : If the remote’s battery is dead or weak, it won’t transmit the signal to your car. Replace the battery and try programming again. Verify the Compatibility : Make sure that the remote is compatible with your vehicle’s make, model, and year. Some vehicles require special remotes that can only be programmed by the manufacturer or an authorized locksmith. Reset Your Vehicle’s System : In some cases, you might need to reset the car’s system to clear previous programming attempts. Check your owner’s manual or consult a professional for assistance. Consult a Professional : If you continue to have issues, it might be time to visit a dealership or a certified locksmith. These professionals have the tools and experience to program the remote correctly and ensure everything works seamlessly. Why Programming Your Keyless Remote Is Important Programming your keyless remote is a simple but important task that helps ensure your car’s security and convenience. By understanding how the process works and what to do if things go wrong, you’ll be able to troubleshoot and solve any issues quickly. Whether you’re replacing a lost remote or adding a new one to your collection, knowing how to program your remote saves time and money compared to visiting a dealership or locksmith. With the increased reliance on keyless remotes for unlocking and starting vehicles, it’s essential for every car owner to be familiar with this process. By keeping your remote in good working condition and knowing how to program it when necessary, you’ll enjoy a smoother, more efficient experience with your vehicle.

The Ultimate Guide to Opel, Peugeot, and Citroën Car Keys: Battery Replacement, Flip Key Issues, and Shell Compatibility

The Ultimate Guide to Opel, Peugeot, and Citroën Car Keys: Battery Replacement, Flip Key Issues, and Shell Compatibility

Car keys have come a long way from simple metal tools to advanced electronic devices. While they offer convenience and security, they're also prone to wear and tear over time. If you own an Opel, Peugeot, or Citroën, you've likely encountered a dead battery, faulty buttons, or a cracked key shell. These issues, though frustrating, are easy to fix with the right approach. This guide explores everything you need to know to maintain or restore your car key's functionality—without unnecessary expense. From understanding how these keys work, to step-by-step maintenance practices, we'll walk you through all the essentials to keep your keys working like new. How Car Keys Work Today Modern car keys are more than just tools to unlock and start your vehicle. They are miniaturized computers embedded with microchips, transponders, and signal systems that communicate with your car's onboard electronics. Most Opel, Peugeot, and Citroën models feature flip keys with integrated remote buttons, and inside each key fob lies a delicate configuration of electronics that perform critical functions like remote unlocking and engine ignition authorization. These keys depend heavily on power from a small coin-cell battery, usually the CR2032. While small and seemingly insignificant, the battery is the heart of your key fob. When it begins to fail, even slightly, the symptoms can range from reduced signal range to complete unresponsiveness. That’s why it’s crucial to replace it in time. Replacing the Battery in Opel Car Keys Your Opel car key is essential to your daily routine. Over time, the lithium CR2032 battery inside may weaken, resulting in slower response or reduced range. The good news is that replacing it is straightforward and requires only a few tools. Once you identify your key type—typically a flip key with two or three buttons—you can open the casing using a small screwdriver or plastic tool. Inside, you'll find a battery nestled within the key's internal framework. Carefully remove the old battery and insert a new CR2032, ideally a reliable model like the Panasonic CR2032 . Proper alignment is crucial; the wrong orientation can prevent the key from functioning entirely. Align the shell halves carefully and press them back together until they click into place. If your key shell is also showing signs of damage or wear, consider replacing it with this Opel 3-button key housing . Replacing the battery is a quick job, but it makes a world of difference in reliability and peace of mind. Plus, it spares you the inconvenience of getting stranded or needing dealer intervention. Common Peugeot Flip Key Issues and How to Fix Them Peugeot flip keys are compact and stylish, but frequent use can expose a few recurring problems. The flip mechanism may lose tension, buttons may stop responding, or the outer shell may crack. In many cases, the spring inside wears down, and the plastic buttons may degrade over time. Exposure to moisture, dirt, or accidental drops can also damage the key fob. These symptoms can often be resolved by replacing both the battery and the key shell. Thankfully, most replacement shells come with a new flip mechanism already installed, making the process quick and cost-effective. If you're dealing with a damaged shell or non-functional buttons, a compatible Peugeot key shell can restore both the look and performance of your key. To repair your key, begin by opening the shell using a thin screwdriver. Remove the internal circuit board and transponder chip carefully. Transfer them into the new shell, ensuring everything fits snugly. Insert a fresh CR2032 battery before closing the key shell, then test all functions. Unlike dealer replacements, this DIY approach is affordable and efficient, putting the control in your hands. Understanding Citroën Key Shell Compatibility Citroën keys often resemble Peugeot models but feature subtle design differences that can impact shell compatibility. Before purchasing a replacement shell, it's important to examine a few key details. First, confirm that the button layout matches exactly—some models include a trunk release, while others do not. Next, check the blade type, usually HU83 or VA2, and make sure your new shell supports that configuration. You’ll also need to ensure there’s a space for the transponder chip, as without it, your car won’t start. Lastly, confirm that your circuit board (PCB) fits securely in the new housing. If you're unsure, compare your key with this Citroën 3-button shell for reference. A mismatched shell can result in poor fitment, misaligned buttons, or failure to lock and unlock your car. That’s why it's important to compare your current key closely to any replacement product. Shell replacements are not one-size-fits-all—small deviations in size or design can render them useless. Going Beyond: Caring for Your Car Key Long-Term Maintaining your car key goes beyond occasional repairs. Think of it as part of your overall vehicle care routine. Keep your key clean by regularly wiping it down with a soft cloth. Avoid exposing it to moisture or extreme temperatures, which can damage the battery and internal electronics. If your key starts to feel loose or if the blade no longer flips smoothly, it's a sign that maintenance is due. Another often-overlooked aspect is the condition of your key ring. Overloaded or heavy keychains can put unnecessary strain on the ignition switch and the key’s blade over time. Keeping your key light and secure can prolong both the key and the ignition system’s lifespan. If you find yourself frequently pressing buttons or experiencing lag in signal response, don't ignore it. These early symptoms are usually signs that a new battery is needed, or the shell's contacts are worn. Addressing small problems before they escalate can save you from full key failure. Car Key Maintenance Caring for your car key doesn’t have to be a daunting task. Whether you drive an Opel, a Peugeot, or a Citroën, regular maintenance and minor DIY repairs can significantly extend the life of your key. Replacing a worn battery and upgrading a broken shell not only restores functionality but also revives the overall appearance of your key. Use quality components, take your time during repairs, and always test your key before final assembly. By taking these small steps, you can avoid costly replacements and enjoy reliable key performance for years to come. Explore trusted replacement parts and accessories online at mr-key.com to keep your car keys in top condition year-round.

Everything You Should Know About Key Fob Battery Life, Leaks, and Temperature Effects

Everything You Should Know About Key Fob Battery Life, Leaks, and Temperature Effects

The convenience of a modern car key fob is hard to overstate — it unlocks doors, starts engines, and sometimes even controls your car remotely. But at the heart of all these features lies a small coin battery, usually a CR2032, that powers your fob’s every function. Like all batteries, it doesn’t last forever, and certain conditions can shorten its lifespan or cause unexpected problems like leaks. In this guide, we’ll explore how long your key fob battery should last, what causes leaks, and how temperature plays a critical role in battery performance. How Long Do Key Fob Batteries Typically Last? Most key fobs use lithium coin batteries like the CR2032. These are designed for small electronic devices and typically last between two to four years, depending on how often you use your fob and how close it stays to your vehicle. Constant use — such as frequent locking and unlocking — can deplete the battery faster. If your smart key remains within range of your car at all times, it may draw more power passively. Another key factor is the quality of the battery. High-grade batteries like those from Panasonic usually last longer and offer more consistent voltage. You’ll know it’s time for a replacement when the fob works only at short distances, you need to press buttons more than once, or the indicator light becomes dim or fails to light up at all. Catching these early signs is important, as a simple battery replacement can prevent unexpected lockouts or costly service calls. Battery Leaks in Key Fobs: Risks and Prevention Though not as common, a leaking battery can be far more destructive than a dead one. Leakage can corrode the internal components of your key fob, sometimes making it unusable. Signs of a leak include white residue inside the battery compartment, visible corrosion on the metal contacts, or a strange smell or dampness near the battery slot. Leaks often occur in batteries that are expired, low-quality, or exposed to extreme heat or moisture. To reduce the risk of leaks, it's a good idea to replace your key fob battery every two years, regardless of performance. Always use reputable brands such as Panasonic CR2032 , and store spare batteries in a cool, dry place. Also avoid mixing new and old batteries, even temporarily. If you notice any signs of leakage, remove the battery promptly and clean the compartment using a cotton swab and isopropyl alcohol. If the corrosion is severe, replacing the key fob casing or consulting a specialist may be necessary. How Temperature Affects Your Key Fob Battery Life Ambient temperature can have a major effect on battery efficiency. In cold conditions, the chemical reactions within a lithium coin battery slow down, resulting in reduced voltage and sluggish or inconsistent performance. A key fob left overnight in freezing temperatures might stop working until it warms up. On the flip side, high temperatures accelerate battery depletion. Leaving your key fob inside a hot car or near a heat source can shorten its lifespan and, in rare cases, even cause the battery to leak. Heat can also warp internal components, especially in compact spaces like key fobs. To protect your battery, avoid exposing your key fob to direct sunlight or intense heat for long periods. Don’t store it in jackets or compartments that get hot in summer, and try to keep a spare battery handy if you live in an area with extreme seasonal swings. Choosing temperature-resistant batteries — like those from Panasonic — adds another layer of protection. Key fob batteries are small but essential parts of modern car ownership. Understanding their typical lifespan, recognizing early signs of failure or leakage, and knowing how temperature affects their performance can help you avoid unpleasant surprises. With a little foresight, you can keep your key fob working smoothly for years. Replace the battery every two to three years, choose high-quality brands, and take precautions during temperature extremes. A few minutes of care now can save you from frustration later.

Chat with us